Wednesday, April 29, 2009

$10 Designer Meal: Stuffed Shells with Gorgonzola Skirt Steak

My chest freezer has become a despairing land of forgotten foods. I can never pass up a good sale. It doesn’t matter that I don't have any immediate need for it, into the freezer it goes. Once that door slams shut though, out of sight out of mind, like the skirt steak I got on super sale for $1.75 lb over a year ago (....OOPS!). It’s been hanging out for quite a while in my guilt complex next to the duck breast which I finally took care of at Easter. The steak seemed sad, missing its once feathered friend, so I decided to send it the same way and maybe they could meet somewhere in the hereafter.


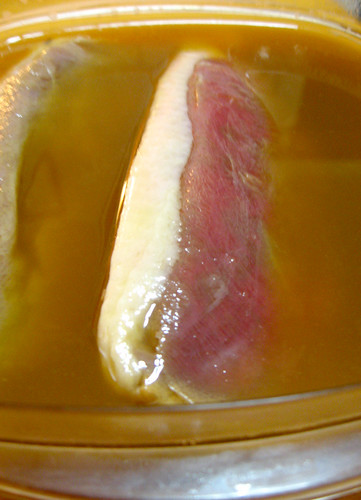
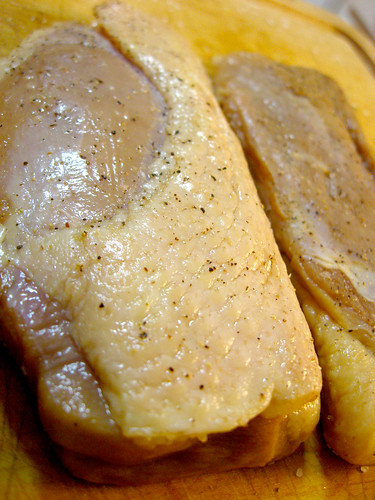
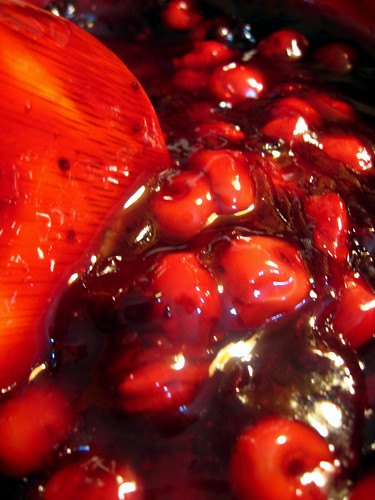
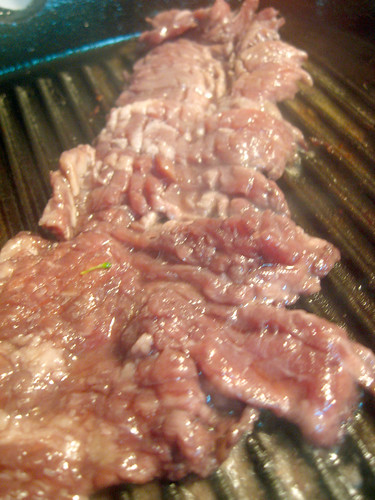
From its long stay in the frozen hinterlands, I was concerned about the meat being tough which can be a problem with fresh skirt steak. One neglected food deserves another, so a bottle of red wine which had turned to vinegar from months of sitting in windowsill would work for a marinade, and help tenderize the meat.


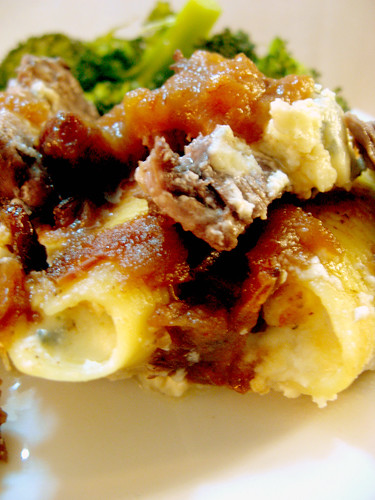
Baked shells with apple chutney sauce.

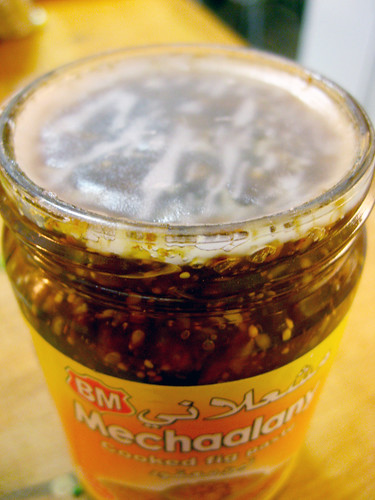
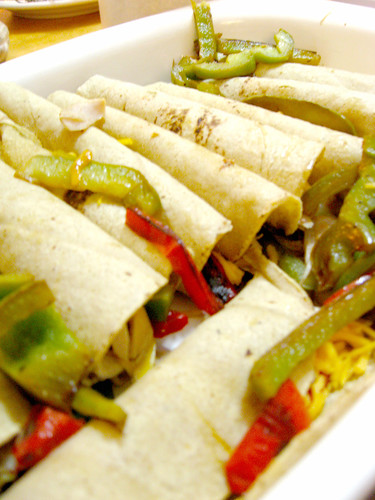
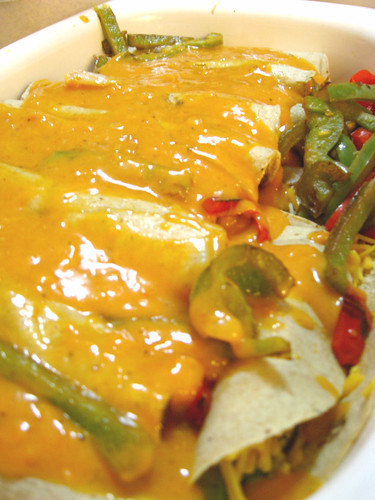
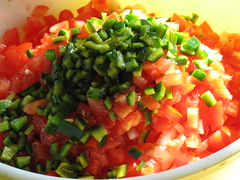
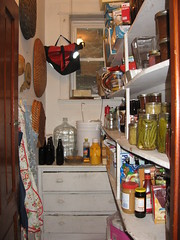
The Gorgonzola, left over from salad night would go well with the beef. In walking through my pantry, I pulled some large pasta shells which I could stuff and bake. For a filling, blue cheese is a bit strong on its own, so I would have to tone it down using a milder cottage cheese or ricotta. I just needed a sauce. A tomato sauce didn’t sound right, but when I passed some jars of apple chutney, I knew that was the ticket. All in all, I only had to run out for the ricotta which I found at the corner store (just as cheap as the cottage cheese!). Here’s how it came together.

Apple Chutney Conchiglie with Gorgonzola Skirt Steak
  • 16 large pasta shells
  • 1 tsp olive oil
  • 8 oz. Gorgonzola blue cheese
  • 1/4 c. sun dried tomatoes, chopped
  • 1 tsp dried thyme
  • 12 oz. ricotta cheese
  • 2 eggs
  • 2-3 c. apple chutney
  • 1 lb. skirt steak
  • 1-2 cups red wine
  • salt and pepper to taste
Marinate the steak in wine; chill for 1 hour.

Meanwhile, boil pasta shells al dente in boiling water with olive oil.


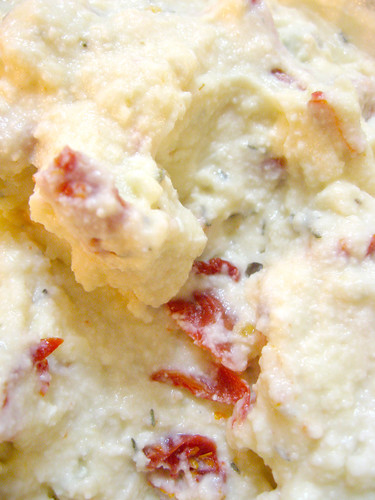
Mix 3/4 of the Gorgonzola with the tomatoes, thyme, ricotta cheese and eggs.


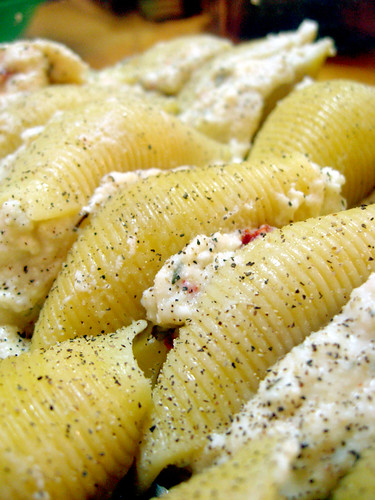
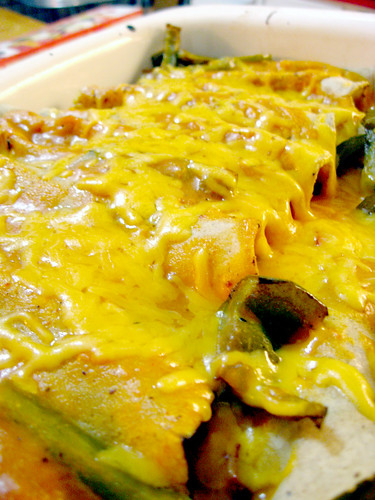
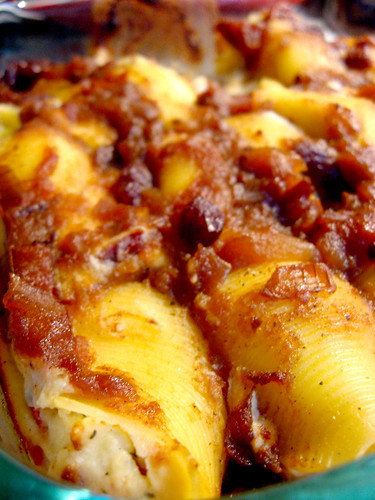
Stuff each shell with filling and place in a baking sheet. Sprinkle with salt and pepper and spoon apple chutney over shells. Bake in a preheated oven at 400 degrees for 30-40 minutes.


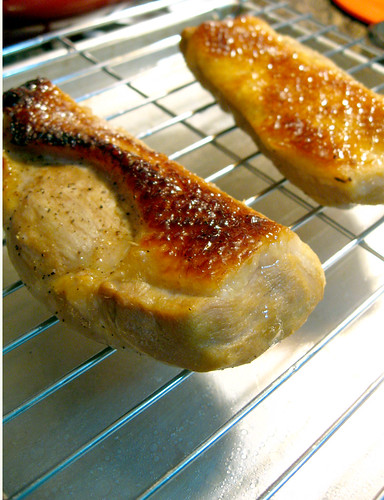
15 minutes before shells are done, remove steak from marinade. Rub both sides with salt and pepper. Saute on a cast iron grill over high heat. (3-5 minutes). You can use a regular pan if you don't have a grill. Flip to cook second side, and drizzle cooked side with the remaining blue cheese.


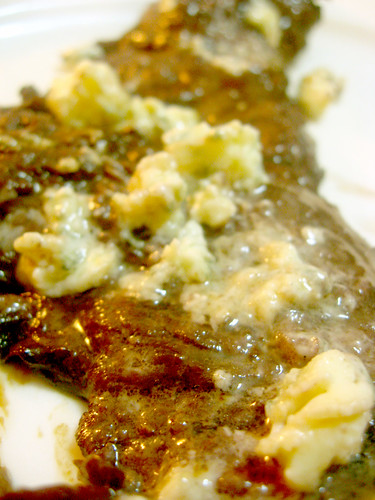
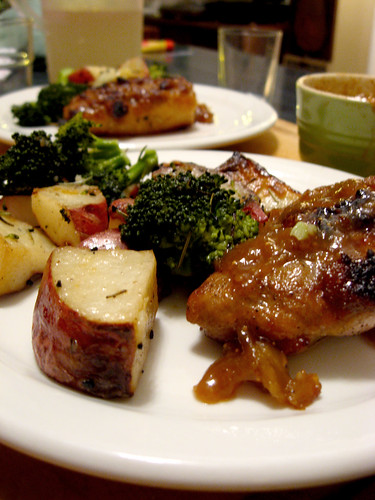
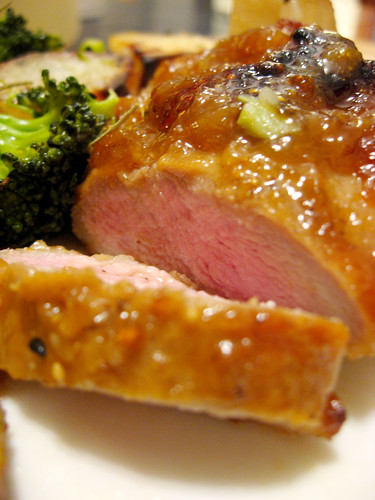
Slice steak and serve over baked shells. I sided my dish with steamed broccoli. As a quick tip, I kept the water boiling from the pasta shells and placed the broccoli in a bamboo steamer over the boiling water while I was cooking the steak. After steaming for about 10 minutes, I drizzled with butter, salt and pepper.


Arrrh, this was so good! (So good, I turned into a pirate for a second). I was super happy with how well the steak turned out, especially considering how long it sat in the freezer and how crappy the wine was. This meal cost about $10 in all, if you don’t include the ingredients for the homemade chutney. Now lets play my favorite game: “how much woud you pay for this plate at a fancy restaurant.”

Sunday, April 26, 2009

Stretching A Dollar Into A Pitcher: Fresh Squeezed Limeade

Fact: few things are as delicious and refreshing on a warm afternoon then freshly squeezed fruit juice. To celebrate the thermometer finally surging into the 70s, Ira decided to pull out the citrus reamer and make an ice cold pitcher to sip on our stoop.


Our neighborhood bodegas usually limes for 10 cents a piece, so we were able to whip this delicious drink up for only $1.00. Now that's making the most of a dollar!

Freshly Squeezed Limeade
  • 10 limes, juiced
  • 2 c. sugar
  • 8 c. water
  • ice


Squeeze limes. We have this handy dandy 2:1 lemon and lime squeezer which is awesome and easy to use. A wooden reamer works great too, but if you don't have any of these just use a fork.

Add sugar. This drink has ALOT of sugar, but who cares about our teeth on a day like today. We just want to drink a delicious beverage. So don't worry about it, and just mix that shit in.


Add ice and water. Stir it up. Keep adding water until the taste is just the way you like it.


Drink up and taste the summer. Now that's crescent fresh!

Thursday, April 23, 2009

Brinner: Eggy Eyeball.

Its time for dinner, but you want breakfast. It happens. We can take care of this problem quick and easy.


Uova Di Pomodoro (Eggs Baked in Tomatoes)
From the Silver Spoon Cookbook
  • vine ripened tomatoes
  • same number of eggs
  • 1 tsp of olive oil for each tomato
  • dried oregano
  • salt and pepper


Preheat the oven to 400 degrees

Cut off the tops of the tomatoes and scoop out the seeds.

Sprinkle the inside of the tomatoes with salt and lay upside down on a paper towel to allow to drain for 10 minutes.

Put 1 tsp of olive oil in each tomato and sprinkle the insides with a pinch of oregano and pepper.


Bake tomatoes for 20 minutes. Remove from oven and add egg to the center of each tomato. The eggs will sizzle in the hot oil.


Place the tomatoes back in the oven for 5-7 minutes.


I sprinkled the tops with Parmesan cheese and dried dill. Don't they look like little eggy eyeballs? Is that unappetizing?


I sided the tomatoes with the left over potatoes and broccoli from our Easter Dinner. Boom, 30 minutes later and its brinner time.

Monday, April 20, 2009

Cheddar Biscuits Can Equal Big Discounts

Spring is here and the weather is getting warmer. Time for some fun bike riding. Girls, here's a great hint if you have a bike which needs work. Men love biscuits. It makes them feel all old timey, like cowboys on the range. Put on a cute skirt and make a plate of biscuits and wheel that rusty hunk to the shop. Flash some smiles, whip out the biscuits and get some discounts!


Here's a cut above your average biscuit to help seal the deal.

Cheddar Biscuits with Sun Dried Tomatoes
  • 1 3/4 c. flour
  • 1/2 tsp salt
  • 3 tsp baking powder
  • 2 Tbs Parmesan cheese
  • 4-6 Tbs chilled butter
  • 3/4 c. milk
  • 1/4 c. shredded cheddar
  • 1/4 c. sun dried tomatoes, chopped


Preheat oven to 450 degrees.

Mix dry ingredients and Parmesan cheese. Using a fork or pastry cutter, mix butter into the dry ingredients until chunky. Add milk and mix until dry ingredients stick together to form a rough dough. Don't over work it. Add tomatoes and mix.

On a floured surfaced, roll dough out about 1/2" - 3/4" thick. Cut out biscuits, using a circular cookie cutter or juice glass with approx. 2" diameter and place on a baking sheet.


Place in the oven and bake for 10 minutes. Remove tray from oven and sprinkle biscuits with cheddar cheese. Place back in the oven for 2-5 more minutes until biscuits are golden and cheese is melted.

Wednesday, April 15, 2009

Duck Boobylicious: Broiled Duck Breasts with Fig Miso Glaze


For a holiday meal deserving a special treat, there's nothing like duck boobs! Ha ha ha. I mean, ahem, duck breasts, of which I had 2 plump specimens in my freezer saved for such an occasion. They had actually been in the freezer for a bit too long and I was starting to worry they might be going bad. Cooking them up gave me a fancy meal free of any guilt of letting such a delicacy die the slow death of freezer burn.


Our Easter dinner of broiled duck breasts sided with rosemary roasted potatoes and lemon steamed broccoli.

I've never had good luck preparing duck before, usually overcooking it into duck leather. At $11.99 a lb, I wanted to make sure my duck turned out! When thinking about the preparation options, I decided to brine the breasts to help the meat retain as much juice as possible. A quick hot cooking method like broiling or sauteing is a good way to sear the outside of the meat and seal the juices in. Broiling with a glaze would infuse rich flavors as well as give a sweet caramelized exterior. I had my method; I just needed my ingredients.


The jar of fig paste on left was sealed with a layer of wax. How old timey!

Whenever I go on a food shopping adventure, I always like to treat myself to one or two exotic treats like the Duck Breasts I got on a visit to Mitsuwa. Easter dinner is a perfect excuse to go whole hog so I pulled out all my fancy ingredients. For the brine I needed an acidic base which immediately put me to mind of the persimmon vinegar I got on my last visit to Chicago Foods. The fig paste from Al Khayam would provide a rich tart base for the glaze. On to the prep.

Broiled Duck Breasts with a Fig Miso Glaze
approx. 1 hour of total cook and prep time with 3-4 hours for brine
  • 2 4 oz. duck breasts
Brine:
  • 1 c. vinegar
  • 1 c. orange juice
  • 1 tsp kosher salt
  • 1 Tbs brown sugar
Glaze:
  • 1/2 c. fig paste
  • 2 tsp miso
  • 2 Tbs olive oil
  • 2 Tbs persimmon vinegar
  • 1 tsp sesame seed oil
  • 1/4 tsp wasabi powder
  • 1/4 tsp brown sugar

Duck in the brine.

Similar to red wine vinegar, the persimmon vinegar had a very deep tart flavor, so I mixed some orange juice with the brine to sweeten the flavors. I let the duck soak submerged in the brine for 3-4 hours in the fridge.


On left, the breasts after the brine, patted dry with salt and pepper. On right, the breasts on a makeshift rack after the first 4 minutes under the broiler.

I'd never made duck breasts alone before, so I wasn't sure the proper time broiling. I did a quick google search and just clicked on the appropriate first recipe I saw which could give me a rough idea of times. The recipe states:
  1. Pat duck breasts dry and sprinkle all over with salt and pepper.
  2. Remove rack of a broiler pan, then add 1 cup water to broiler pan and replace rack. Preheat broiler with pan 5 to 6 inches from heat.
  3. Broil duck breasts, skin sides down, 4 minutes
  4. Turn over and broil until thermometer inserted horizontally into center of a breast registers 130°F (see cooks' note, below), 8 to 10 minutes more for medium-rare.
The info given for the temp the breast should read on the thermometer was very helpful. To insert my glaze into the recipe above, I proceeded with steps 1-3 and added the glaze to the top of the breasts after flipping over and placed the back in the oven to finish broiling for the last 8 minutes.

Though my duck breasts were half the size as the ones listed in that particular recipe, by following the first steps along with the temp guide lines, I was able to make sure my Duck breasts were plump, juicy and delicious.


The rich fatty meat was complimented by the deep sweet and tart flavor of the fig mixed with the vinegar and miso with an extra little kickass taste of wasabi. Sided with roasted potatoes and steamed broccoli with lemon and black caraway. The quack was loud but our bite wasn't vicious and that dinner I was cookin was duck boobylicious!

Sunday, April 12, 2009

Happy Easter


One badass peep
Originally uploaded by Corey (Lost his Groove)


My Catholic school upbringing is making me feel a little guilty about posting this gory Easter image, but that really is a badass peep. Don't worry guys, its just play acting. Its not even real blood.

Saturday, April 11, 2009

Hanky Pysanky


Ukrainian eggs are awesome! Growing up, we always looked forward to Easter, but not for the candy. My Mom always made a big deal about decorating the Easter eggs . We tried the Ukranian technique a couple times but we could never get ours to have the crisp lines or sophisticated designs you see in pictures. Ours always looked like they had been made by a three year old with a severe hand tremor. We did have lots of fun blowing the egg insides out of the shell through two tiny holes poked at the ends to keep our eggs from rotting.


Although the process of making these eggs is time consuming, they come in all shapes and sizes and are so beautiful to look at!

Wednesday, April 8, 2009

What Do You Do With Pierna De Pollo? I Dunno. Enchiladas?

I found it at the bottom of my freezer, all red and wrapped up in cellophane but I don't remember buying it: a package of pierna de pollo. To preface, I don't speak Spanish well. Once in Ecuador when trying to ask the bus driver to turn down the loud music, I actually asked if he could make the big music more tranquil. Using my same genius at language, I assumed "pierna" had something to do with the red seasoning rub coating the chicken. (Yes, I do know "pollo").


Browning the chicken to prepare for braising.

I was thinking I could quickly saute the meat for fajitas but after defrosting, I realized I had a bunch of chicken hind quarters which where oddly sliced in half long ways. With lots of bones to deal with, I wasn't going to be able to quickly saute anything. I scrapped my quick plan and decided to braise the chicken in a bottle of white wine left over from a party.


An hour or so later, I had a pot of braised chicken legs in a greasy wine broth, but not exactly sure where I was going from here. I figured whatever the "pierna" seasoning was, had also cooked into the broth, so it was too good to dump. It would have to be part of the dish. I was thinking a soup maybe, but after a long winter I am SO F**ing SICK of soup I can't take it anymore. Next in my mind: make a sauce for enchiladas. So I did. Here's how.


Chicken Enchiladas with Wine Sauce
  • 2lbs chicken, browned
  • 1 bottle of white wine
  • 1 large onion cut into 1" slices
  • 2 Tbs tomato paste
  • 1 tsp corn starch
  • hot sauce
  • 1 green pepper sliced
  • 1 red pepper sliced
  • 2 cups shredded cheddar cheese 1 8 oz. bag
  • 1 package corn tortillas
After braising the chicken and onion in wine (about an 60-90 minutes at 350 degrees), strip the meat from the bones. My meat was not as moist and tender as I would've liked so I cut it into smaller chunks to make it easier to eat.

Next make the sauce. I separated half of the broth out to use to make a side dish of rice. With the remaining broth, heat until just boiling and stir in tomato paste which will help temper the tart wine flavor with its sweetness. Remove 1/2 cup or so of the wine broth and stir in the corn starch quickly so it doesn't chunk up. Mix the milky liquid back into the broth stirring to avoid lumps. As liquid gently boils it will begin to thicken into a nice sauce, about 5 minutes or so. Add hot sauce to taste.

Saute green and red pepper over medium heat until softened about 5 minutes or so.

Assemble the enchiladas by stuffing the tortillas with the braised chicken, sauted peppers, and a bit of cheddar cheese (1 cup or half the bag).


Stuff the tortillas tight into an oven safe pan. Pour the sauce over the tortillas and bake for 20 minutes at 350. Sprinkle the remaining half of cheese on top and place back into the oven for a couple minutes until the cheese is nice and melted.


Chicken Enchiladas served with white rice cooked in wine broth with coconut milk and black pepper.

This was a weird take on enchiladas as the sauce was more tart then spicy, but they were just as satisfying. I really liked the cheddar with the wine sauce. Alcohol and cheese, who would have thunk?

I kept wondering what was in the "pierna" seasoning? Well, thanks to the internet, I realize the red rub was probably some adobo seasoning because pierna de pollo directly translates to "chicken leg". Ha ha. I guess I should have paid more attention in Spanish class. Oh well you know what happens when you "ass-u-me".

Sunday, April 5, 2009

Quick and Fruity Breakfast Pastries

The best way to get everyone to like you is to fill them up with sweet treats. A Sunday brunch seems like the perfect opportunity for bribing people with some sort of delicious breakfast bites except for one thing: I hate getting up early. HATE IT. I also like to go out on Saturday night, so if I am going to make it the day before, it has to be fast and easy.


Black currant and cherry pastries with lemon zest sugar topping.

I've been obsessed with whipping up these quick danishes by stuffing puff pastry with a berry filling. Pre-made puff pastry is a shortcut we approve of, as making puff pastry from scratch is putzy and time consuming. Fresh or frozen berries can be thickened with sugar and cornstarch to create the filling or if you are really pressed for time, you can just open up a can of pre-made pie filling.


Quick Fruit Pastries
  • fruit filling
  • 1 package of puff pastry
  • 1 egg
  • 1/2 c. sugar
  • citrus zest.
To make your own Fruit filling:
  • 2 cups berries or chopped fruit, frozen, canned or fresh (doesn't matter)
  • 1 c. sugar
  • 2 heaping Tbs cornstarch
  • 1/2 c. fruit juice (you can just use water if you don't have juice)
Mix in a sauce pan, bring to a boil and continue to stir until the sauce is nice and thick. You can add some added flavoring to the filling depending on your fruit. Almond extract goes great with berries. Citrus zest can give be fun, but a little goes a long way.


Puff pastry usually comes in a box with two sheets. Defrost dough and roll out each sheet into 12" squares. Cut the squares into quarters and quarter again so you have 16 small squares. Spoon 1 tsp of fruit filling into the center of each square. Brush raw egg along all edges of each square.


Assemble the small pastries by pinching the corners together at the center. Then pinch together the open corners so there are no places where filling can leak out. Pinch tightly with fingers to seal, if the dough is giving you trouble you can twist the dough.


Brush with raw egg and top with sugar. I like to add some fresh lemon or orange zest into the sugar to give some added pep!


Bake little guys for 15 minutes at 400 degrees. Remove from oven when the dough is nice and golden. Allow to cool completely before placing in air tight containers.


The next morning, these pastries are little light crispy bites of fruity friendship. Everyone will like you and you will be happy.

Wednesday, April 1, 2009

2 Secrets For The Best Quick Chicken Noodle Soup

I got home from work to find a sick Ira swaddled in layers of blankets begging for chicken soup. A hot bowl of soup can make all the difference when you're sick so I knew I couldn't refuse, even though my favorite guilty pleasure was going to start in 20 minutes.


Did I miss my show. No! I was able to get this started before showtime and finish up during the commercial breaks. Amazing? Not really, I just know the tricks.

My top two tips for a quick hearty soup:
  1. Awesome Chicken Stock:

    A nice potent chicken stock is really easy to make and so much better then anything you can buy. You can make soup with canned broth, but it won't taste as good. We're not cooking this soup for very long, so if the stock/broth is weak, the soup is going to be bleh. Stock is easy to make ahead and freeze. I always keep some on hand. Microwave it for 5 minutes to defrost and bam, you've got broth that's basically good to go.

  2. Spaetzle Noodles:

    Where would chicken noodle soup be without the noodles? Spaetzle noodles are the best secret for an awesome chicken soup. They can be bought dehydrated at the store, and cook into rich luscious noodles. They are soo hearty, they'll help put some pep in your sickie's step right after eating!
Want my quick chicken soup recipe from scratch? OK. Here it is.

The Best Quick Chicken Soup
prep time: 10-15 minutes cook time: 15-25 minutes
  • 1 quart chicken stock
  • 1 small onion, chopped
  • 1 large carrot or 2 small carrots, chopped
  • 2 stalks of celery, chopped
  • 1/4 chicken breast chopped into 1" chunks
  • ~ 1 cup loosely packed dried spaetzle noodles
  • salt and pepper to taste
  • splash of lemon juice
Saute onions, carrot and celery in 1 Tbs of olive oil until onions are translucent.

In a medium soup pot, brown chicken over medium heat. Add sauted onions, carrot, and celery. Add chicken stock. Bring to a boil and reduce to low heat. Allow to simmer for ~15 minutes.

Add spaetzle noodles and allow to cook for 5-10 more minutes, or until spaetzle is soft and cooked through.

Season to taste. Add 1/8 tsp of pepper is probably good. I never salt my chicken stock when I make it. This recipe probably needs 1-2 tsp. Start with a little bit and taste. Keep adding until you've got enough. With salt, its good to start slow. You can always add more, but its difficult to remove too much. If you do over salt, just add water to dilute. I like to throw in just a splash of fresh lemon juice for a bit of kick. Plus, vitamin C is always good for the sickie.


Eat and feel better.