Wednesday, September 30, 2009
We've moved to ForkableBlog.com
Hey! We've moved to: ForkableBlog.com! All the archived posts from here have been moved and cataloged into a new, easily searchable format which makes this information much more accessible. Come check it out!

Tuesday, September 29, 2009
Launching Our Massive Redesign: Wednesday, September 30!
In less then 24 hours, we will be leaving this layout behind and unveiling the new face of Forkable! Our new layout will focus on being a more user friendly interface which will allow for much easier access of our archived posts. You can now browse recipes by type and ingredient, as well as search by any term with a search dialog box. Its so exciting! We're taking this digital food project to the next level!
Here's a quick peak at our new banner.

Goodbye www.forkable.blogspot.com and hello www.ForkableBlog.com!
Here's a quick peak at our new banner.
Goodbye www.forkable.blogspot.com and hello www.ForkableBlog.com!
Sunday, September 20, 2009
Update Over Brunch: Website Redesign
It may appear as though I'm being a slacker on the blog since I haven't been updating as much as usual, but I assure you, I am not. As I said in my last post, we're working on a massive Forkable redesign which will hopefully take this project to the next level from a simple food blog to functional online food resource. I'm working on categorizing posts so you can browse recipes by type and cuisine as well as adding tags so recipes will be searchable by ingredient. This is a massive undertaking so be patient with me. As long as I don't get driven insane by all the html, css, .php and other web jargon my simple mind is attempting to process, we should be up and running in the next month or so.
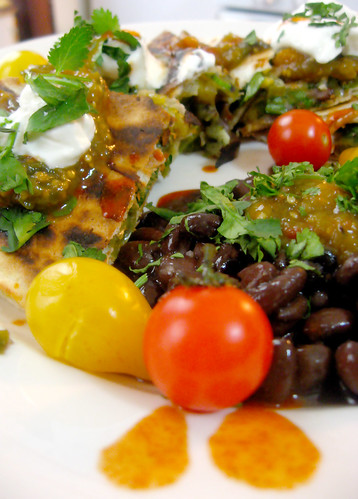
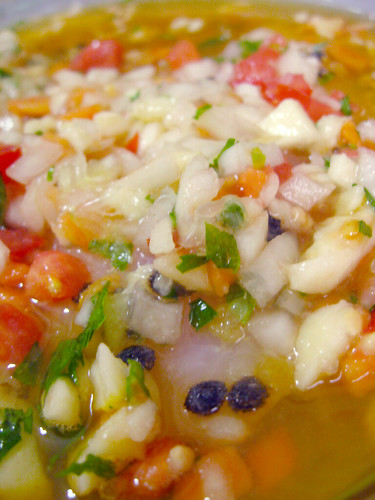
Since I can never publish a post without a picture, here's the delicious brunch I've made myself to nosh on while I slave away on the behind the scenes action. Quesadillas and black beans with the fresh roasted salsa verde I made with organic produce from my parents house.
Tuesday, September 15, 2009
Canning Tomatoes: Roasted Salsa
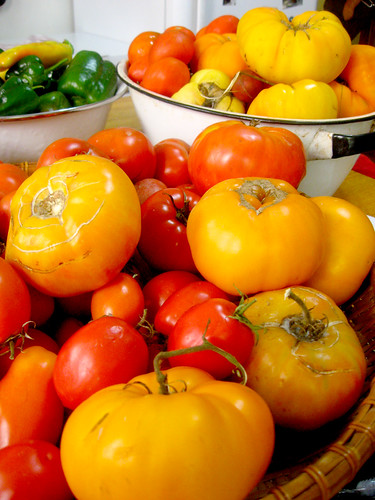
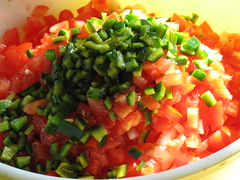
My visit to my parents house this past weekend, produced a harvest of over 30lbs of tomatoes. I've been super busy lately (mostly working on a huge redesign of this blog which I hope to be launching in the next month!! More on this later) and I'm really short on time lately. I like salsa, but I don't have time to chop the ingredients for one batch, let alone 30 lbs worth. What to do? Don't worry I have a solution.
Check out this Instructable to see my time saving salsa recipe along with tons of canning tips. Also, check out the comments for links to tons of online resources for canning methods.
Canning Tomatoes: Roasted Salsa - More DIY How To Projects
Ok, here's my cliffnotes for you lazy bones: My shortcut to hours of chopping and slicing is to roast all the ingredients together until they are nice and soft, then blend it in a food processor. And you're done! Beside being a shortcut, the roasting also helps bring out the natural sweetness of the flavors which makes for a delicious salsa! I can get it taken care of this afternoon and and I'll can it this weekend to preserve it.
Friday, September 11, 2009
Dilly Green Beans!
Dill pickles= dilly pleasure. Crunch cruch. I love dill pickles. But pickles doesn't just mean cucumbers. Pickles can be anything that's pickled! For the first post in our canning series, check out this crowd pleasing recipe (in instructable form) for dill pickles made of green beans. These are always a crowd favorite. Don't believe me. Try them out for yourself.
Canning Dilly Green Bean Pickles - More DIY How To Projects
Canning Dilly Green Bean Pickles - More DIY How To Projects
Tuesday, September 8, 2009
Canning: The Pleasure of Putting Up the Harvest
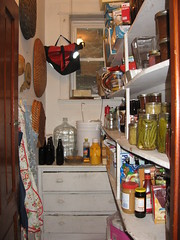
This time of year, my Dad can be found carrying overflowing baskets of produce back to the house. My Mom can be found in a steamy kitchen, lowering jars stuffed with their homegrown veggies into boiling pots of water, to thwart spoilage and preserve them for the upcoming winter. Despite the back breaking work, my Mom always talks about the pleasure she feels in putting up the harvetst to feed her family and continue the tradition of her farming heritage.

Jars of green beans to be pickled.
Growing up, as I helped my Mom with our garden's produce, she told me stories of helping her Mother put up preserves from their family farm. My memory has flavored these stories with a very romantic (if not slightly unrealistic) image of the women in my family joined in loving comradory, escaping into their temporary basement kitchens, gossiping and laughing over their work together. The reality was probably more like a bunch of tired women, spending their spare time between their day jobs, slaving over the hot, boiling pots, working late every night until their pantry was full, but what is reminiscing for but to forget the hardships and romanticize the past.
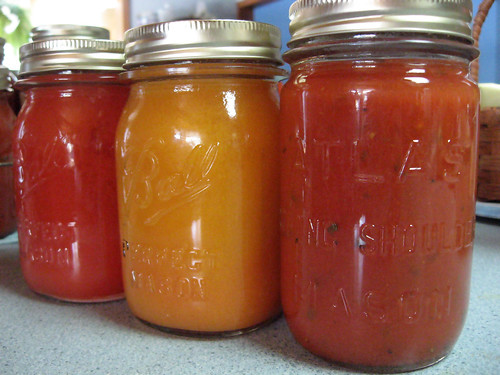
My parents canned tomato juices, regular, low acid and tomato basil.
Although canning and preserving foods for the winter is no longer a necessity for survival, it now represents an affordable year round source of organic produce, as well as a continuation of tradition. For me, even further removed without a garden of my own, perhaps it is this lack of necessity which helps me to enjoy the tradition of this process. I can delight in my voluntary trip to the farmers market or to my parents house and get a great satisfaction looking at the jars of food I've put up which will save me money while still giving me great quality of food.
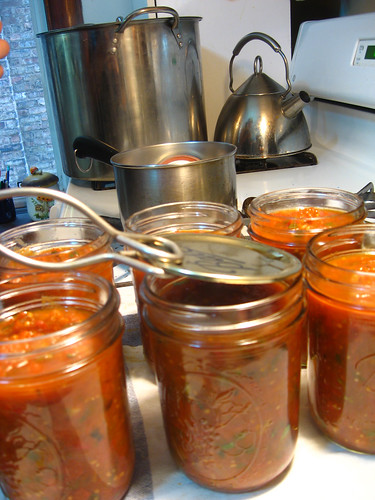
Canning roasted salsa.
Since its that time of year, we're gonna get all hot and steamy in here as our posts put up a harvest of digital delight chronicling our adventures with canning! Stay tuned.
Jars of green beans to be pickled.
Growing up, as I helped my Mom with our garden's produce, she told me stories of helping her Mother put up preserves from their family farm. My memory has flavored these stories with a very romantic (if not slightly unrealistic) image of the women in my family joined in loving comradory, escaping into their temporary basement kitchens, gossiping and laughing over their work together. The reality was probably more like a bunch of tired women, spending their spare time between their day jobs, slaving over the hot, boiling pots, working late every night until their pantry was full, but what is reminiscing for but to forget the hardships and romanticize the past.
My parents canned tomato juices, regular, low acid and tomato basil.
Although canning and preserving foods for the winter is no longer a necessity for survival, it now represents an affordable year round source of organic produce, as well as a continuation of tradition. For me, even further removed without a garden of my own, perhaps it is this lack of necessity which helps me to enjoy the tradition of this process. I can delight in my voluntary trip to the farmers market or to my parents house and get a great satisfaction looking at the jars of food I've put up which will save me money while still giving me great quality of food.
Canning roasted salsa.
Since its that time of year, we're gonna get all hot and steamy in here as our posts put up a harvest of digital delight chronicling our adventures with canning! Stay tuned.
Thursday, September 3, 2009
C-BLT With Chipotle Mayo

C-BLT? What's the "C" for, you ask? Representing the makers of my favorite whiskey, rock musicians and sketch "coamody" troup, eh?, its for our hockey loving neighbors to the north! It puts the Canadian in Bacon!
Before I get too far into my love of sweet, sweet Canadian bacon, I have to digress a bit to another love: vine ripened organic heirloom tomatoes!
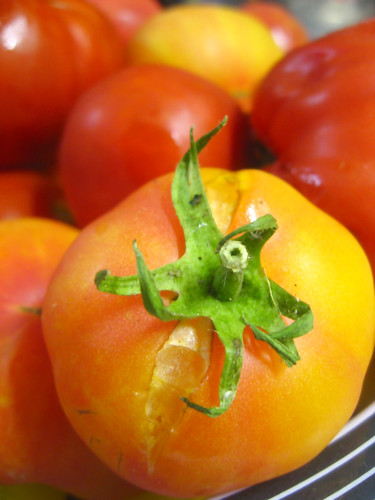
When I say vine ripened I don't mean the stuff you buy at the store, I'm talking about grown by the sweat of your friend's brow. (sweat is always better when its off someone else's brow). When my friend, Wendy, gave me a bag full of the most delicious, sumptuous tomatoes, I knew I had to do something worthy of their ripe beautiful bounty. I can't cook these tomatoes! They're too sweet and supple. What could make the most of this sweet seasonal treat...hmmm. I got it!! BLT's!! Nom nom.
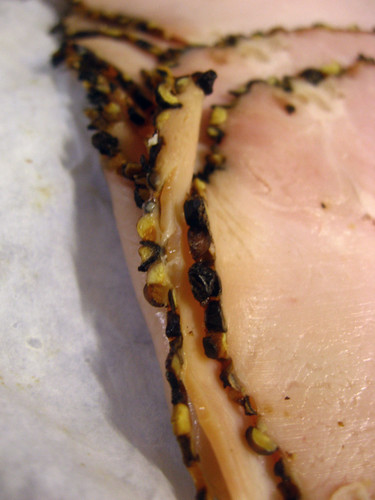
But it can't be just any BLT. It has to be a special BLT! Not just any bacon will do. No, for this, I need a special, supple bacon: thick and sweet but seasoned with a special kick! Peppercorn-encrusted Canadian Bacon, made by my local Polish Deli, is sooo delicious!

Ok, we've got the B and the T, but we still need the L. No ordinary lettuce will do obviously. I want fresh, so fresh...so fresh its actually still alive!! Hydroponic Lettuce! Yes sir, this stuff is still alive, and its up to you to go in for the kill. Rip those leaves off, and eat 'em. SO fresh, so sweet.
Finally the last ingredient. Mayo. To me this is as much an important part as the other ingredients. I don't know why they never added it in. Well I'm going to! BMLT. Oh, wait. I get it. That's gross. Ok, so I'll leave it out of the name, but not out of the sandwich. Since all the other ingredients are going for gold, we can't just use regular mayo. We're going to make chipotle mayo! Delish:

Chipotle Mayo
enough for 3-4 sandwhiches
1 chipotle pepper, (from a can: see above pic) chopped into paste
1/2 c. good mayo
1) Mix together. Easy. Done!
How was that for a recipe? You don't need a recipe for a CB-CM-LT. Fry the bacon, toast the bread, slap the mayo on the bread. Layer toppings and you're done. Lets sum this up:

This sandwhich is going to kick ass!
B: Peppercorn encrusted Canadian Bacon
L: Hydroponic Lettuce
T: Organic Vine Ripened heirloom Tomatoes
not to forget: our Chipotle mayo.

All of these round little ingredients compliment each other so nice. Time to EAT!!! NOM NOM NOM! I love BLT's!
Monday, August 31, 2009
3 Tips to Make Perfectly Mashed Yucca

I've always thought of yucca as being a very exotic thing. Not only is it not part of the average American diet but it also has some very strange textural characteristics which make it very weird. Yucca, similar to a potato, is often eaten boiled and mashed. Because it is VERY high in starch, if you give the yucca mash a good mix, it becomes very sticky and gooey. This paste can be very good for various things, but I've found, I often end up with this sticky paste, when all I wanted was mashed yucca.
Here are 3 quick tips for getting a good mashed yucca.
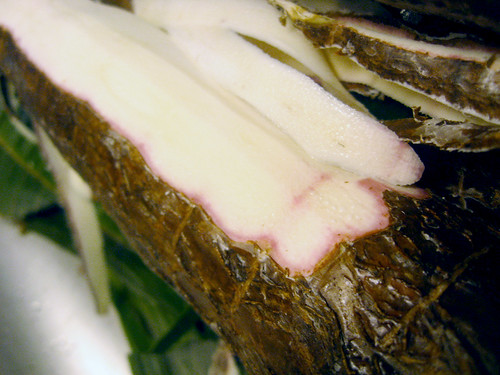
1. Peel completely. Remove the hard outer skin as well as the pinky underskin. The delicate white inside will be less fibrous then the outer layers.
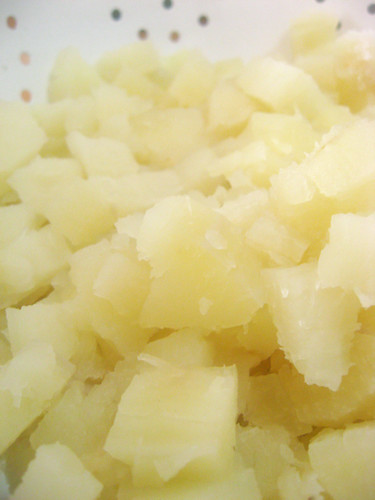
2. Boil the shit out of it. Cut the yucca into disks or chunks and boil in water. I always boil potatoes until you can put a knife into it, but I've found, you have to boil yucca longer. It starts to break up in the water, but it will still be hard inside. Keep boiling it until it falls apart easily to the touch. This means the fiber has broken down a bit.

Potato Ricer: image courtesy of Exlibris
3. Use a potato ricer to mash the yucca. A ricer helps separate the hard fiber from the softer mash, leaving you with a perfectly fluffy pile of mashed yucca. I know you may not have a potato ricer, its sort of an unnecessary kitchen item. However, once every decade, it comes in handy, and this is one of those occasions.
Thursday, August 27, 2009
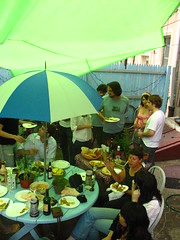
Afternoon Delight: Seafood and Wine
To finish up our series profile on Isaacson and Stein, nothing would be better then to show a little party which sprung from a visit there. Last Friday, my friends Meena and Anki (in town from Paris) wanted to hang out, but I needed to do a bit of blog work. Well, we, at Forkable, love to multi-task, so why not hit two birds with one stone! I&S is such a fun place to visit, I brought them along with me and let them peruse the goods while I got a few photos.
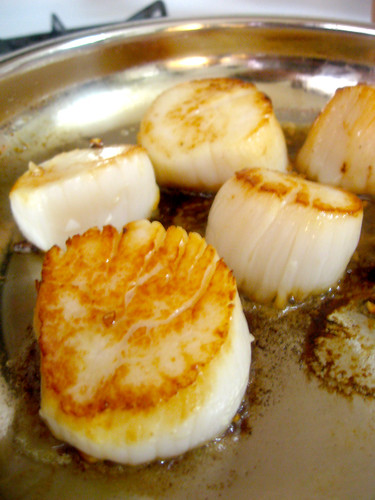
Searing our scallops for a delishous afternoon treat.
After I was done, we walked around and picked out a few morsels to bring home to snack on. Of course, our eyes were bigger then our stomaches and we ended up leaving with a bag full of shrimp, scallops, mussels and ahi tuna steaks. OH DELISH! We weren't complaining.
The wonderful thing about the seafood, is it can be prepared very easily in no time at all. We got the tuna in a soy-miso-vinegar marinade and set it aside in the fridge. Anki, quite diligently worked on de-viening the shrimp, while Meena prepared a garlic butter for the scallops. Meanwhile, I got the mussels steaming with white wine and butter. Once we were ready, we got two pans fired up on the stove, we seared the scallops-rubbed in garlic butter, and the tuna with a miso rub.
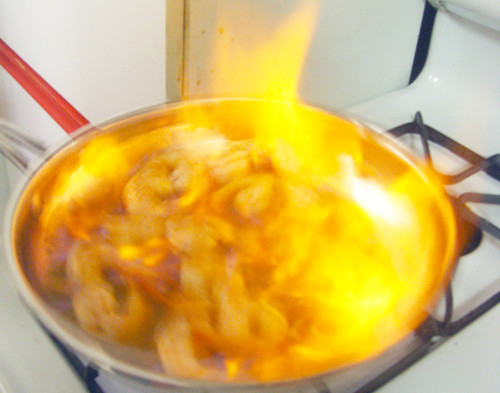
Shrimp a la flambe!
Once these were done, we quickly added some more garlic butter to the pan with the scallops, and did a quick saute with the shrimp. We added some lemon juice and a bit of rum (Anki wanted to start a fire!) and finished them off with a dramatic flambe. At this point, the mussels were done, we finished up the toast we had under the broiler, and we took our fest outside to nosh!
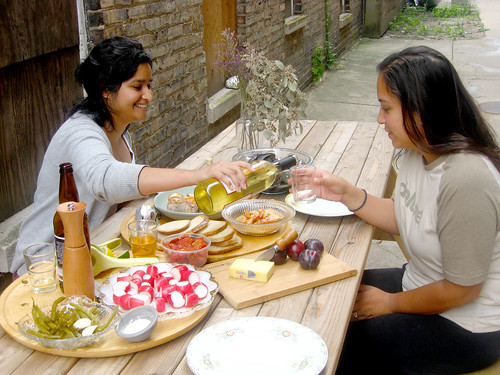
Anki makes sure Meena's not running on empty. What a decadent spread!
What a luxurious afternoon! Only 20 minutes of cook time in the kitchen, $12 each for the supplies, and we were eating like kings. Yum. We had so much fun working together and our Garlic scallops, Tuna steaks, mussels in a white wine butter dipping sauce, and shrimpies a la flambe were c'est magnifique! . Can you get any more decadent?
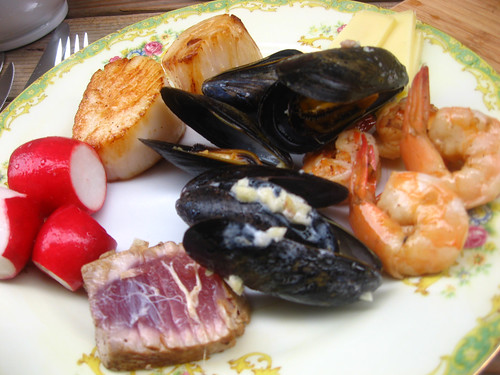
Lets play the game "what would you pay for this plate at a restaurant"? More then $12. I think that's a big yes!
Well we also had raddishes with salt and lime, fromage de gruyere (we're putting on french airs to impress Anki), sun dried tomatoes and my homemade pickled green beans. We had a great time from start to finish, and in true french form, quite a bit of wine was drank throughout the process. Sorry the pics are a bit blurry. What can I say. Que sera sera. Oh wait that's Spanish. Hmm. C'est la vie! There we go. Who said "Amurican's" were ignornt.
Searing our scallops for a delishous afternoon treat.
After I was done, we walked around and picked out a few morsels to bring home to snack on. Of course, our eyes were bigger then our stomaches and we ended up leaving with a bag full of shrimp, scallops, mussels and ahi tuna steaks. OH DELISH! We weren't complaining.
The wonderful thing about the seafood, is it can be prepared very easily in no time at all. We got the tuna in a soy-miso-vinegar marinade and set it aside in the fridge. Anki, quite diligently worked on de-viening the shrimp, while Meena prepared a garlic butter for the scallops. Meanwhile, I got the mussels steaming with white wine and butter. Once we were ready, we got two pans fired up on the stove, we seared the scallops-rubbed in garlic butter, and the tuna with a miso rub.
Shrimp a la flambe!
Once these were done, we quickly added some more garlic butter to the pan with the scallops, and did a quick saute with the shrimp. We added some lemon juice and a bit of rum (Anki wanted to start a fire!) and finished them off with a dramatic flambe. At this point, the mussels were done, we finished up the toast we had under the broiler, and we took our fest outside to nosh!
Anki makes sure Meena's not running on empty. What a decadent spread!
What a luxurious afternoon! Only 20 minutes of cook time in the kitchen, $12 each for the supplies, and we were eating like kings. Yum. We had so much fun working together and our Garlic scallops, Tuna steaks, mussels in a white wine butter dipping sauce, and shrimpies a la flambe were c'est magnifique! . Can you get any more decadent?
Lets play the game "what would you pay for this plate at a restaurant"? More then $12. I think that's a big yes!
Well we also had raddishes with salt and lime, fromage de gruyere (we're putting on french airs to impress Anki), sun dried tomatoes and my homemade pickled green beans. We had a great time from start to finish, and in true french form, quite a bit of wine was drank throughout the process. Sorry the pics are a bit blurry. What can I say. Que sera sera. Oh wait that's Spanish. Hmm. C'est la vie! There we go. Who said "Amurican's" were ignornt.
Tuesday, August 25, 2009
A Free Guided Fishing Expidtion to Isaacson and Steins
I felt really intimidated going into Isaacson and Stein for the first time. I didn't want to look like I didn't know what I was doing. I was afraid of asking anyone questions for fear of bothering them, or being seen as an idiot. The piles of whole fish made me feel inept in my inability to clean them. But, it was all in my mind. People here are nice and there's nothing to be intimidated of!
So you can make the most of your first I&S fishing expedition, here's 8 tips for smooth sailing!
So you can make the most of your first I&S fishing expedition, here's 8 tips for smooth sailing!
- Know the hours: They have weird hours. They're never open past 4:15 during the week, although they are open 8-1 on Saturdays.
- Try to make it in during the week: its worth it. Saturdays are always busy busy and the selection is picked through. I go on Fridays when its pretty low key. If they're not busy, the staff is way more willing to shoot the shit and help you pick out the right fish for your dish!
- Go early. If you go on Saturday, try to make it there as early as possible to get a good selection.
- Know the process:
- Grab gloves: There's a box of plastic gloves on the table on your right when you come in. You'll want them to handle the fish.
- Get your fish weighed: When you've decided on what you want, take your bag of fish to the table to the right of the door. Guys behind the table will weigh your stuff and give you a receipt.
- Pay for your fish: take your receipt to the guys at the window on your left and pay, cash or credit.
- Check the signs: Signs above the fish tell you more then just the name and price. It will also list where the fish come from, if its farm grown or wild, and if its fresh or previously frozen which guarantees you know what you're getting.
- Don't be afraid to ask questions. If you're not sure which fish will work for your recipe, how you want it cleaned, or what's the best stuff at the moment, ask someone. Just don't be offended if they don't give you a long answer. If they're busy, they can be brisk. It is a whole saler after all. I've always found them to be very helpful!
- Get Your Fish Cleaned: Once you've paid, get in line at the two cleaning stations to the left of the payment windows. After your fish is cleaned, tipping is suggested. I have to make a confession, I never have (eek!). These guys are so covered in fish juice, with thick rubber gloves on, I don't know where to put the money. Give it to them... put it in their pocket.... I've never seen any one else do it either. If anyone has advice on this, I'll take it!!
- Use the Fish Bones in Stock: If your getting your fish cleaned, keep the bones and head. You paid for it, and you can use it for stock! They also usually have fish bones in the back corner you can buy for stock as well. I only use whitefish bones though, bones from salmon and other dark varieties make a really fishy stock which is definitely an acquired taste.
- Be Prepared:
- Don't get grossed out: This place is stinky and there's dead fish everywhere. There's fish juice all over the floor. Like Cat B says, "Don't wear flip flops".
- Fish can rot: Raw fish and seafood are very delicate. Make sure you can go straight home afterward or carry a ice chest with you.
- Park your car! They have parking spots out front. How lucky! Well if you have a car.

Monday, August 24, 2009
Where Can I Find Fresh Fish In Chicago? Hellya: Isaacson & Stein!!
We get a lot of seafood sympathy from our seaboard friends for Chicago being landlocked and so far away from the coasts? (Lake Michigan grunts. Sorry Dude, you know what I mean). While its true, you'll never see lobster for $3.00 lb here, not all the sympathy is warranted. So, is it possible to find fresh, reasonably priced fish in Chicago?
Ugh!! Did I hear you say Whole Foods? I'm sorry you've been paying so much! No, no no! The answer is Isaacson and Stein's!

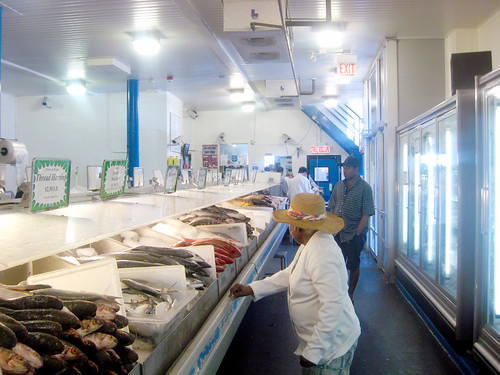
This has to be one of my favorite spots in Chicago, which the Yelper, Emily L. rightly describes as "Holy Foodie Heaven!" Isaacson and Stein, a fish wholesaler in the meatpacking district (Fulton off Halsted) which is, as it's sign reads, OPEN TO THE PUBLIC!! If you've never been here, its worth a trip, just to look at the fish!
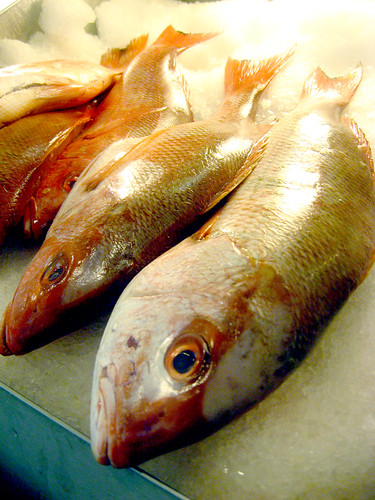
Ohh! Wild Caught Red Snapper!
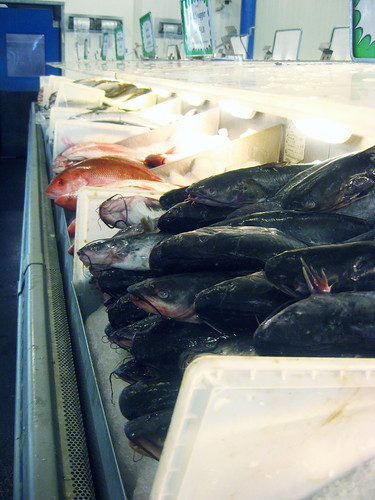
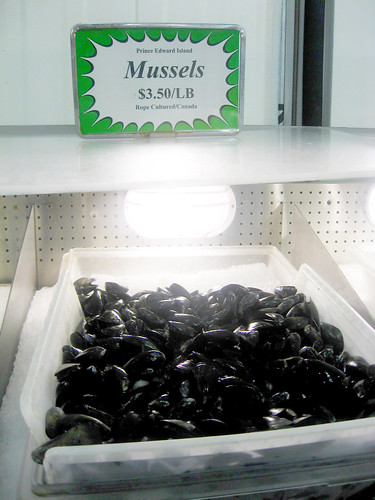
Their selection is awesome, ranging from the exotic to local, with rare South American varieties next to locally caught whitefish and perch. Classic seafood options are almost always available, including my favorite fresh muscles, succulent scallops and shrimpies of various sizes. Most of the fish is sold whole, but as the week wears on, you'll see more and more piles of fillets all cleaned and prepped that day.
Whole fish? Don't worry, after you buy the fish, you can take it over to the two cleaning stands and have one or their amazing mongers gut and clean everything for you, so you get to leave with the freshly cleaned fillets ready for your dinner.
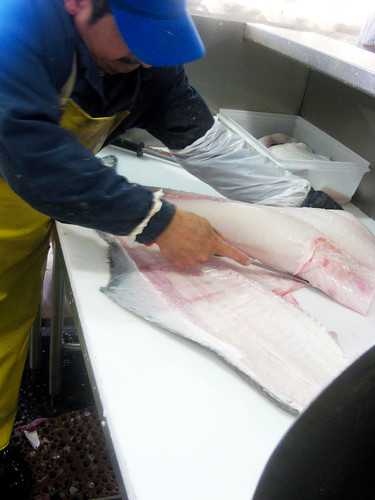
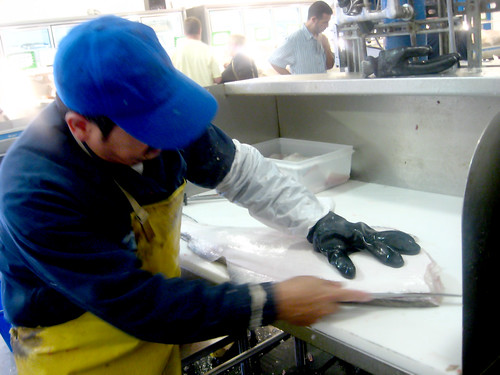
Action shot: Cleaning an Alaskan Halibut! I'd never seen even a partially whole halibut before. This fish is huge and he filleted it in one solid quick motion. These guys really know how to wield a knife!
Okay, I know I sound like a paid commercial, but I'm not alone. People freak out about this place. Don't believe me? Check out their 4 1/2 star yelp page.
Ugh!! Did I hear you say Whole Foods? I'm sorry you've been paying so much! No, no no! The answer is Isaacson and Stein's!
This has to be one of my favorite spots in Chicago, which the Yelper, Emily L. rightly describes as "Holy Foodie Heaven!" Isaacson and Stein, a fish wholesaler in the meatpacking district (Fulton off Halsted) which is, as it's sign reads, OPEN TO THE PUBLIC!! If you've never been here, its worth a trip, just to look at the fish!
Ohh! Wild Caught Red Snapper!
"Ah, the smell of fish on a sunny afternoon. Once your nose adjusts to the waft of fish stank (if that is possible), this place is really a gem."This store's one big room is a weekly conduit of over 10 reeking tons of the most beautiful fresh fish and seafood in the city. If its good enough for the best restaurants in Chicago, its good enough for me! I'm no snob.
-Scott A.
Their selection is awesome, ranging from the exotic to local, with rare South American varieties next to locally caught whitefish and perch. Classic seafood options are almost always available, including my favorite fresh muscles, succulent scallops and shrimpies of various sizes. Most of the fish is sold whole, but as the week wears on, you'll see more and more piles of fillets all cleaned and prepped that day.
Whole fish? Don't worry, after you buy the fish, you can take it over to the two cleaning stands and have one or their amazing mongers gut and clean everything for you, so you get to leave with the freshly cleaned fillets ready for your dinner.
Action shot: Cleaning an Alaskan Halibut! I'd never seen even a partially whole halibut before. This fish is huge and he filleted it in one solid quick motion. These guys really know how to wield a knife!
Okay, I know I sound like a paid commercial, but I'm not alone. People freak out about this place. Don't believe me? Check out their 4 1/2 star yelp page.
"I LOVE this place...minus the fish juice I get on my shoes (don't go in there in flip flops!)"Ha! Thanks Cat for the great tip! Speaking of tips, check our User's Guide to Isaacson and Stein so you can make the most of your I&S fishing expedition!
-Cat B.
Friday, August 21, 2009
Succulent Ceviche with Whitefish
Ceviche blew my mind the first time I heard of it. The idea of "cooking" with no heat seemed so exciting; that because of the delicate tissue in seafood and fish, when you soak it in a high acid solution, often lime juice, the acid will break down the cell walls and "cook" the meat.

I love the delicate succulence of sushi and sashimi, and this same quality, often lost or diluted when cooking, is so wonderfully preserved in ceviche. Each bite is a burst of subtle juiciness infused with the tartness of the citric marinade. Nothing can be more satisfying on a warm summer day then this fresh cool dish!

Because this dish is all about the delicacy of the meats, you want a fish which has a more subtle flavor. As awesome as this dish is, it can be made horrible with a strong fishy flavor. Gross gross gross! So stay with a whitefish and you won't be sorry. Although, we are very frugal here, this is a dish which needs good quality fish. It can be made with some cheap farm raised tilapia, but I would suggest going to your local fish monger or grocer and asking for a good fillet cut. I've made this with wild stripped sea bass as well as the Peruvian Corvina sea bass for the Polynesian meal, and the better the meat, the more beautiful this dish becomes. So don't skimp. That's my advice.
The marinade needs to be high enough acid content in order to "cook" the fish. I tried making it with marinades higher in wine content then citrus juice or vinegar but the meat was a bit raw, even after soaking for 8 hours. SO my recipe sticks with the traditional technique of being mostly citrus juice with some additional flavors. Many recipes call for cutting the fillets up into small bite size chunks, which make the soaking time much less, but I like keeping the fillets larger because I feel as though the meat retains the fresh texture better. So with no further ado, on to the recipe.
Whitefish Ceviche
30 minutes prep time, 8 hours total time

Prep fillets: Take each fillet and cut in half or in thirds (for large pieces). If the fillets have differences in thickness, trim any thicker areas to create a uniform thickness. Place the fillets between parchment paper and gently pound to lightly tenderize the meat. Don't beat it, just to slightly mush it a bit.
Soak the fish in salt water: In a bowl of salt water, soak the bowl for 10 minutes or so. This will give the fish a quick brine and help infuse the salt into the meat.
Tenderize the meat: Remove the fish from the salt water and lay out in glass dish. Lay each piece of fish out so they don't overlap. Sprinkle fish with salt and freshly cut pepper. You can use smashed papaya seeds instead of pepper. Optional, you can also sprinkle the meat with dried black tea which helps give a nice subtle bitterness to the sweet taste of the fish. Cover the dish in syran and place in the fridge.
Prep marinade: Squeeze limes for fresh lime juice. Mix juice with wine and vinegar. Set aside. Dice onions, tomatoes and any fresh fruit. I used papaya and mango. The fruit helps infuse a sweetness into the fish.
Assemble ceviche: Remove dish of fish out of the refrigerator. Cover with 3/4 of the diced onion, tomatoes and fruit, reserving 1/4. Pour the marinade so it just covers the fish. Recover and chill.
Flip fish: After 15 minutes, remove the dish from the fridge and flip the fish. Cover and chill. The fish will probably need to sit between 6-8 hours in the marinade to be fully prepared. Check back every couple hours to flip the fish, maybe two or three times.
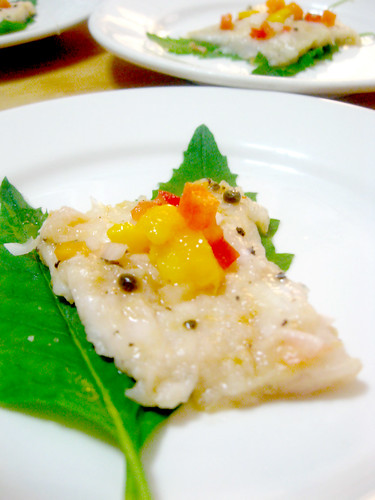
Plate the fish: When you check the fish, take a piece and slice into the center. You'll want it to be white all the way through. If its still pink at the center, it needs a bit more time. When its done, remove the fish from the marinade. Cover with the remaining fresh onions tomatoes and chopped fruit.
Serve, eat, yum!
I love the delicate succulence of sushi and sashimi, and this same quality, often lost or diluted when cooking, is so wonderfully preserved in ceviche. Each bite is a burst of subtle juiciness infused with the tartness of the citric marinade. Nothing can be more satisfying on a warm summer day then this fresh cool dish!
Because this dish is all about the delicacy of the meats, you want a fish which has a more subtle flavor. As awesome as this dish is, it can be made horrible with a strong fishy flavor. Gross gross gross! So stay with a whitefish and you won't be sorry. Although, we are very frugal here, this is a dish which needs good quality fish. It can be made with some cheap farm raised tilapia, but I would suggest going to your local fish monger or grocer and asking for a good fillet cut. I've made this with wild stripped sea bass as well as the Peruvian Corvina sea bass for the Polynesian meal, and the better the meat, the more beautiful this dish becomes. So don't skimp. That's my advice.
The marinade needs to be high enough acid content in order to "cook" the fish. I tried making it with marinades higher in wine content then citrus juice or vinegar but the meat was a bit raw, even after soaking for 8 hours. SO my recipe sticks with the traditional technique of being mostly citrus juice with some additional flavors. Many recipes call for cutting the fillets up into small bite size chunks, which make the soaking time much less, but I like keeping the fillets larger because I feel as though the meat retains the fresh texture better. So with no further ado, on to the recipe.
Whitefish Ceviche
30 minutes prep time, 8 hours total time
- 1-2 lb of fillets of whitefish
- 10 limes
- 1/2 c. white wine
- 1/2 c. sweet vinegar (rice vinegar, white wine vinegar, etc)
- 1 onion, diced
- 1 tomato, diced
- fresh fruit, diced
- salt
- pepper
- optional: papaya seeds, black tea
Prep fillets: Take each fillet and cut in half or in thirds (for large pieces). If the fillets have differences in thickness, trim any thicker areas to create a uniform thickness. Place the fillets between parchment paper and gently pound to lightly tenderize the meat. Don't beat it, just to slightly mush it a bit.
Soak the fish in salt water: In a bowl of salt water, soak the bowl for 10 minutes or so. This will give the fish a quick brine and help infuse the salt into the meat.
Tenderize the meat: Remove the fish from the salt water and lay out in glass dish. Lay each piece of fish out so they don't overlap. Sprinkle fish with salt and freshly cut pepper. You can use smashed papaya seeds instead of pepper. Optional, you can also sprinkle the meat with dried black tea which helps give a nice subtle bitterness to the sweet taste of the fish. Cover the dish in syran and place in the fridge.
Prep marinade: Squeeze limes for fresh lime juice. Mix juice with wine and vinegar. Set aside. Dice onions, tomatoes and any fresh fruit. I used papaya and mango. The fruit helps infuse a sweetness into the fish.
Assemble ceviche: Remove dish of fish out of the refrigerator. Cover with 3/4 of the diced onion, tomatoes and fruit, reserving 1/4. Pour the marinade so it just covers the fish. Recover and chill.
Flip fish: After 15 minutes, remove the dish from the fridge and flip the fish. Cover and chill. The fish will probably need to sit between 6-8 hours in the marinade to be fully prepared. Check back every couple hours to flip the fish, maybe two or three times.
Plate the fish: When you check the fish, take a piece and slice into the center. You'll want it to be white all the way through. If its still pink at the center, it needs a bit more time. When its done, remove the fish from the marinade. Cover with the remaining fresh onions tomatoes and chopped fruit.
Serve, eat, yum!
Wednesday, August 19, 2009
Precious in Pink: Pickled Quail's Egg in Beet Juice
Pickled eggs seem so nice and ol' timey. I imagine some turn-of-the-century saloons where they were available at almost every bar. They're so easy to make. Its just a matter of hard boiling and then soaking them in a brine. My brother-in-law, Jason, always has a jar of them in the fridge, and they do make a great snack; all that protein can really fill you up!
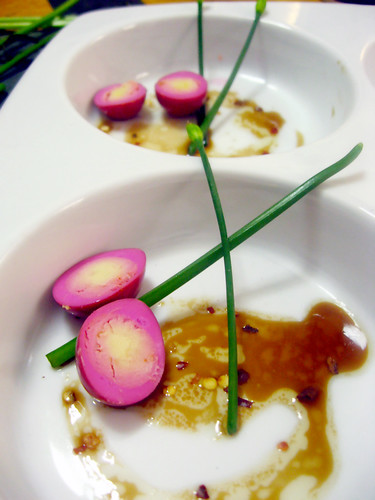
Pickled quails eggs, as garnish for the appetizer course from our Polynesian Meal.
Tiny things are always so precious. You could fit 3 or 4 quails egg inside the shell of an average chicken's so of course, its hard not to adore them. Don't judge them by their size though, although small, once cooked, these eggs are surprisingly tough. Their egg whites are not as soft as their larger counterparts which gives for a surprising texture when bursting into the center and finding a soft, delicate yolk. They are a bit exotic in our culture, but quite common in various Asian cuisines, so are not impossible to find pickled if not fresh in Chinese, Korean or Thai grocery stores.
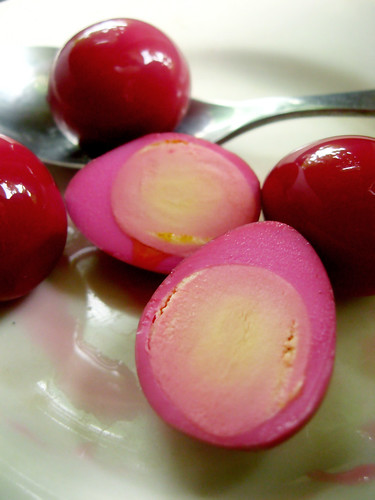
So lets pull out our cauldron, and with a little of toil, toil, boil and bubble, we'll mix together 1 part exotic, to two parts precious, a pinch of ol' timey, and a bit of beet blood for pizzaz and we'll concoct the perfect pickled quails eggs!
(oh come on, I don't mean blood- its beet juice. Sheesh!)
PICKLED QUAIL EGGS
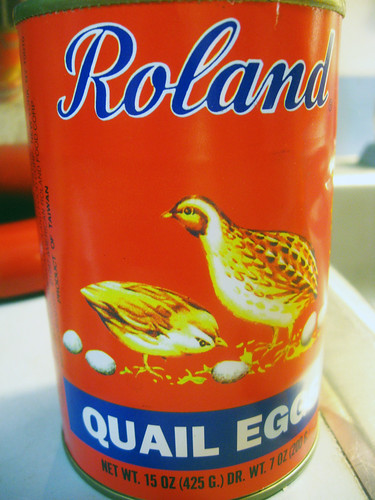
* I suggest getting fresh, as the canned eggs are a bit rubbery. However, the longer fresh eggs sit in a brine, the more they will become a bit rubbery as well. They are best eaten within two weeks. However if you plan to store yours for a while, it doesn't matter if you start out with canned or fresh.
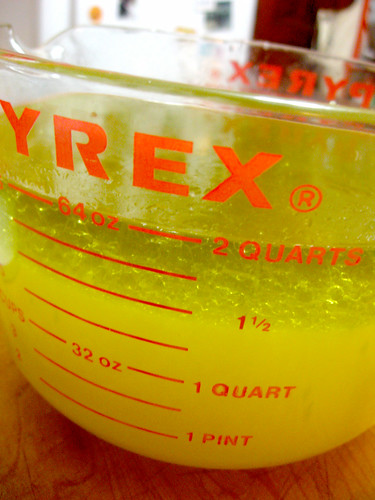
Make beet juice. We'll add beet juice to the brine to give added flavor but most importantly a nice purple color. Clean and wash your beets. You don't have to skin them if you don't want just get all the yuck off. Quarter and place in a pot with water covering about 1" above beets. Cover, bring to a boil and then reduce to a simmer. Allow to cook for about 30 minutes, until you see dark red liquid. Drain and reserve 2 c. of juice for your brine.

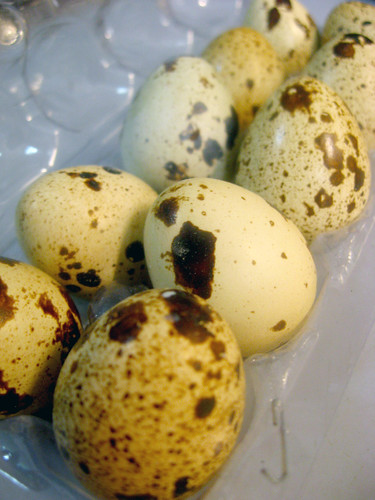
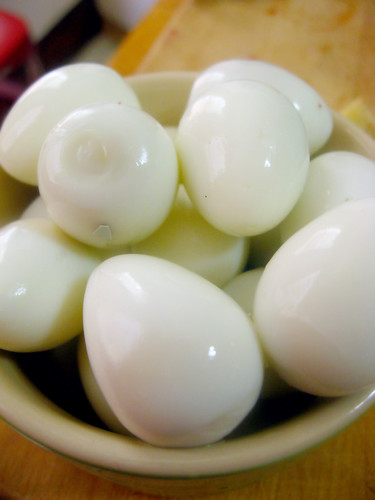
While beets are cooking, we'll prepare the eggs. If you're using canned eggs, you can skip to step 4. If using fresh eggs, we'll need to hard boil them. Place a cloth napkin or towel at the bottom of a pot, place the fresh eggs on the cloth and fill the pot with water. Place the pot on a the stove. Cover and bring to a rolling boil. Once boiling, remove the pot from heat. Let sit for 5 minutes with pot still covered. While its sitting, prepare a bowl of ice water. Take eggs from hot water, and place into the ice water until they cool. This will make peeling them easier. Because they are so small, its easy to damage them while peeling. Peel eggs and set aside.
Create your brine. In your cualdron, I mean in a pot, mix all ingredients, including the beet blood, ahem...juice, but excluding the eye of newt. Ok, joke taken too far now! Excluding the eggs, put everying into a pot and bring to a boil. If you have a pickling spice mix, feel free to use that instead of the whole spices I listed above. Once the brine is boiling, remove from heat.
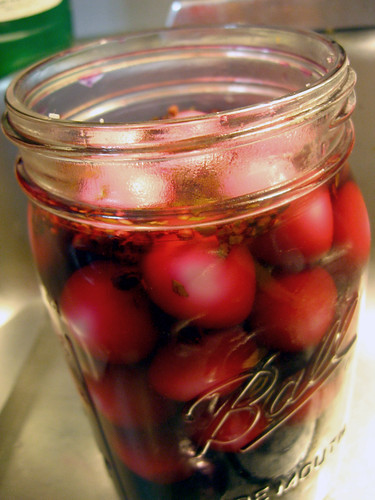
Assemble your jar of pickles. Place your eggs in your quart jar. Pour the hot brine over the eggs, whole spices and all. Fill jar with as much of the brine as possible, place lid on jar and allow to sit. Once cool, you can add in some fresh mint if you want and place in the refridgerator.

Your pickled eggs will be at full potency in about a week and will remain good indefinitely if kept chilled.
Pickled quails eggs, as garnish for the appetizer course from our Polynesian Meal.
Tiny things are always so precious. You could fit 3 or 4 quails egg inside the shell of an average chicken's so of course, its hard not to adore them. Don't judge them by their size though, although small, once cooked, these eggs are surprisingly tough. Their egg whites are not as soft as their larger counterparts which gives for a surprising texture when bursting into the center and finding a soft, delicate yolk. They are a bit exotic in our culture, but quite common in various Asian cuisines, so are not impossible to find pickled if not fresh in Chinese, Korean or Thai grocery stores.
So lets pull out our cauldron, and with a little of toil, toil, boil and bubble, we'll mix together 1 part exotic, to two parts precious, a pinch of ol' timey, and a bit of beet blood for pizzaz and we'll concoct the perfect pickled quails eggs!
(oh come on, I don't mean blood- its beet juice. Sheesh!)
PICKLED QUAIL EGGS
- 3 dozen fresh Quail eggs, or 2 cans of preserved eggs*
- 4-5 medium sized beets, washed and quartered
- 2 c. vinegar (white wine, cider, rice, or any mixture of these)
- 1/2 c. sugar
- 1 tsp. salt
- bay leaves
- black peppercorn
- whole cloves
- fresh mint
- 1 clean quart jar with lid
* I suggest getting fresh, as the canned eggs are a bit rubbery. However, the longer fresh eggs sit in a brine, the more they will become a bit rubbery as well. They are best eaten within two weeks. However if you plan to store yours for a while, it doesn't matter if you start out with canned or fresh.
Make beet juice. We'll add beet juice to the brine to give added flavor but most importantly a nice purple color. Clean and wash your beets. You don't have to skin them if you don't want just get all the yuck off. Quarter and place in a pot with water covering about 1" above beets. Cover, bring to a boil and then reduce to a simmer. Allow to cook for about 30 minutes, until you see dark red liquid. Drain and reserve 2 c. of juice for your brine.
While beets are cooking, we'll prepare the eggs. If you're using canned eggs, you can skip to step 4. If using fresh eggs, we'll need to hard boil them. Place a cloth napkin or towel at the bottom of a pot, place the fresh eggs on the cloth and fill the pot with water. Place the pot on a the stove. Cover and bring to a rolling boil. Once boiling, remove the pot from heat. Let sit for 5 minutes with pot still covered. While its sitting, prepare a bowl of ice water. Take eggs from hot water, and place into the ice water until they cool. This will make peeling them easier. Because they are so small, its easy to damage them while peeling. Peel eggs and set aside.
Create your brine. In your cualdron, I mean in a pot, mix all ingredients, including the beet blood, ahem...juice, but excluding the eye of newt. Ok, joke taken too far now! Excluding the eggs, put everying into a pot and bring to a boil. If you have a pickling spice mix, feel free to use that instead of the whole spices I listed above. Once the brine is boiling, remove from heat.
Assemble your jar of pickles. Place your eggs in your quart jar. Pour the hot brine over the eggs, whole spices and all. Fill jar with as much of the brine as possible, place lid on jar and allow to sit. Once cool, you can add in some fresh mint if you want and place in the refridgerator.
Your pickled eggs will be at full potency in about a week and will remain good indefinitely if kept chilled.
Sunday, August 16, 2009
How To Roast A Leg of Goat and Be Awesome!
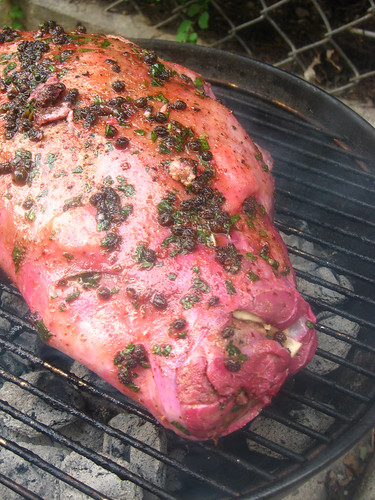
Goat is a bit exotic. If you want to impress people. Exotic always works. So, roast a leg of goat and you'll be awesome. Guaranteed. That's a Forkable promise. You can also go off about how difficult it is to make goat and how its often tough, and then when people bite into the moist juicy meat this recipe will easily provide you, everyone's brains will explode. Maybe that should be the title of this post: How To Make Everyone's Brains Explode with Goat. Hmmm Anyway, onto the recipe.
If at any point during this recipe you ask Why? - here's your answer.
_________________________________________________________
Roasted Leg of Goat
a 4-5 lb leg of goat, bone and all seeds from a large mature papaya 1-2 Tbs kosher salt 2-3 large onions for roasting -for the marinade-20 limes, juiced 1 c. rum 1 c. white wine 2 c. olive oil 1/4 c. brown sugar 2-3 large beets -for the dry rub2 Tbs dry ginger 2 Tbs cumin 1 Tbs coriander 1/4 c. brown sugar 1/4 c. kosher salt 1 Tbs sumac chopped fresh mint head of garlic fresh ginger knuckle- 2" or so.

1) Go out and purchase a fresh leg of young goat from your butcher.
The night before you serve:
2) Trim the roast. The roast may be covered by a hard white surface tissue. If so, you'll want to trim this off. I found this to be a bit difficult, but just do your best to remove as much as possible without hacking apart the roast. Put your fingers underneath the tissue and see if you can work it away from the flesh and cut it off that way. Trim off any extra fat deposits. Reserve for later.
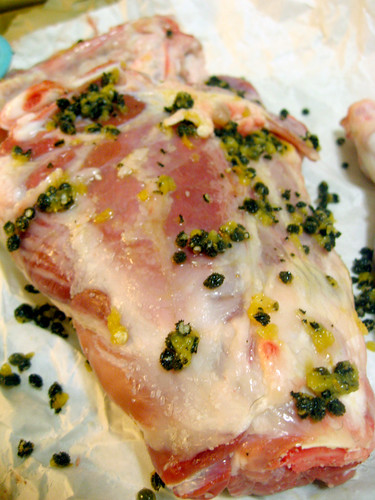
3) Rub smashed seeds and salt on the leg to prepare it for the marinade. Take your papaya and cut in half. Take the seeds from half the fruit and using the flat end your knife, smash them until you can see the white insides. Mix with a few tablespoons of salt and rub over your meat. Chill while you make your marinade.
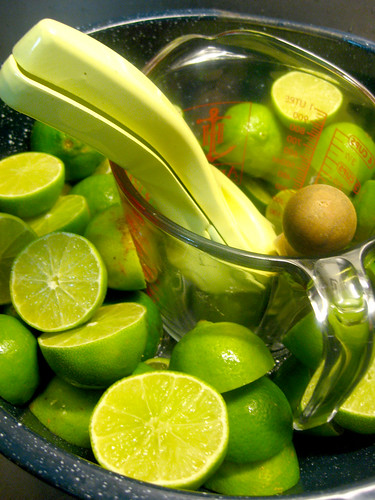
4) Assemble your marinade. Freshly squeeze your limes. Mix lime juice together with your rum, wine, olive oil and brown sugar. Place your leg roast in your roaster and pour the marinade over the leg. Wash and peel your beets, slice and place the slices in the marinade with a few slices on top of the roast.
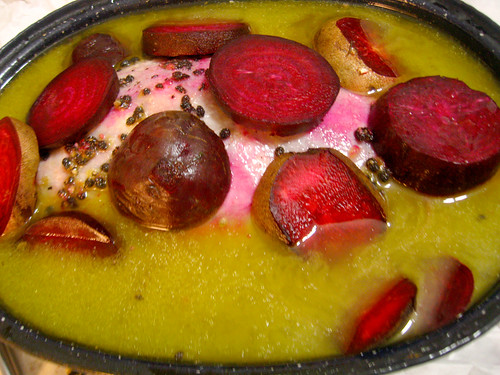
5) Cover the roaster with cellophane and chill overnight. Check your roast every few hours to flip over. You don't need to get out of bed in the middle of the night. Relax. It'll be ok, just don't forget to flip it at least once or twice. Now, go have a drink. You need it.
The Day You Serve:
6) Figure out what time dinner is and schedule cooktime. Once you have dinner time scheduled, figure out the timing of your meat. It will take about 3 hours with the dry rub, 20 min. or so on the bbq and ~90 minutes in the oven. It will be fine to sit for up to an hour after removing from the oven and still be warm. You'll want to get the dry rub on your meal about 5-6 hours before dinner time.
7) Remove the leg from your marinade. Reserve about 4 c. of the marinade for later.
8) Insert your lardoons. Wait, what are lardoons? Well, I can see you didn't read my previous goat article. That's okay. I forgive you. Lardoons are just a fancy way of referring to the fat we trimmed off earlier. Take your roast, and make a few deep incisions into the meat- an inch or so. Stuff these incisions with any trimmed fat as well as a garlic clove and a thin slice of fresh ginger each.

9) Get your dry rub on. Mix your ingredients for the dry rub. Feel free to edit or substitute any of the seasonings on my dry rub. Its not that important, just the salt, sugar and some spice. Take the seeds from the second half of the papaya and smash them the same way you did above. Mix the seeds in with the dry ingredients. They will bind the spices together into a paste. Smear that stuff all over the meat. This is always my favorite part!! Wrap it up in cellophone and chill in the fridge.
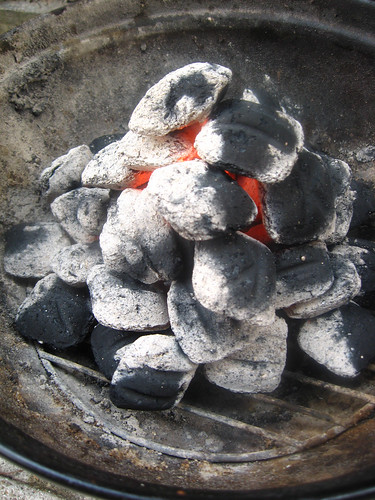
10) Heat up the grill. 30-45 minutes before you're ready to start this roast off, get your grill fired up. Figure out your timing based on your grill. We have a very small smokey joe which takes forever! But you may have a fancy stainless BBQ with burners, sinks and an attached swiveling lazy boy. If so, recline back and press the fire button on your remote control.
11) Preheat Oven. While you're messing with the grill, have the ol' ball and chain preheat the oven to 325. If you don't have an ol' ball and chain, do it yourself, dummy!
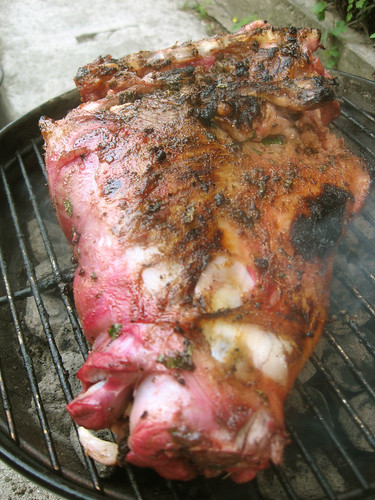
12) Grill it! Once that fire is HOT: get that roast on there, face down first. We're grilling it first to sear it, so only give each side about 10 minutes, more or less until the surface is blackened.
13) Roast it! Have the roaster ready to go at the side of the grill. Fill the roaster with 2-3 large onions quartered to rest the roast on so the meat doesn't burn to the bottom of the pan while its in the oven. Once the meat is done on the BBQ, insert a meat thermometer into the thickest part of the meat and get that pup into the oven. Keep an eye on the thermometer. Once it gets to 130 degrees, probably after 90 minutes or so, remove from the oven.
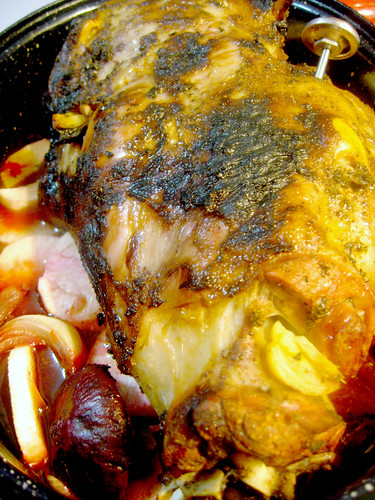
14) Let it rest! After it comes out of the oven, tent it by taking a sheet of aluminum foil and loosely folding it over the top of the leg roast. Let it sit for about 20 minutes. While it sits, you'll notice it will go up to about 140 degrees, which is EXACTLY what we want. Nice- medium rare!

15) Carve it. I wish I could give you better instructions on how to carve, but I can't. I suck at this! I'm told the only way to learn is to practice, so I'll just have to keep at it. Its sort of depressing to make such a beautiful food item and then hack it apart, but oh well. Here's a guide to carving a leg of lamb which may help you. I wish you luck.
Eat it sucka! This of course is always the easiest part. Hopefully you have some people to eat it with. Make sure you tell them how long and hard you worked on this thing. Well, I hope it wasn't actually hard, but make them think it was. Its great when people drool all over you with compliments. Suck it up. You've earned it. You just made a goat! Ha!
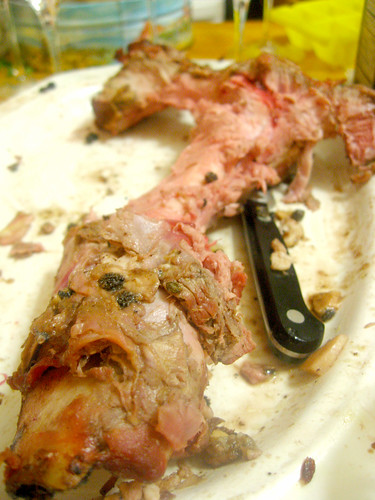
-PS- Don't you dare throw that bone away! Stick it in your freezer to save for stock. There's another long hard winter in front of you and you'll need some broth. I guarantee it.
Subscribe to:
Posts (Atom)