Friday, July 31, 2009

Don't Do The Dishes: Banana Bread in Pork Roaster

Waste not, want not. I believe that. Also, I can be lazy. These are the pillars of this post.


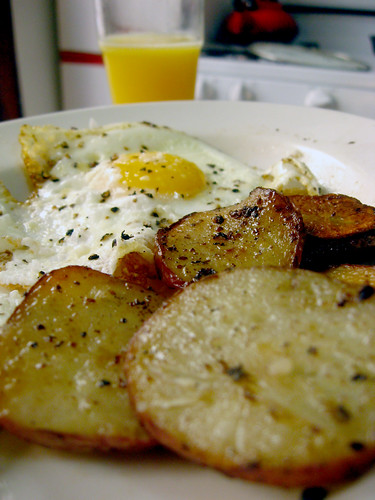
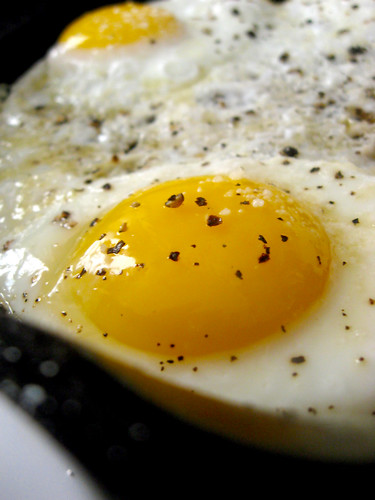
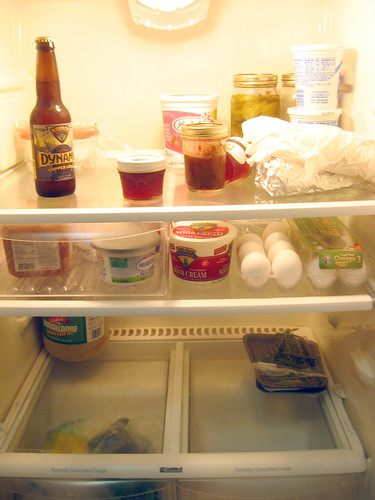
I've been testing recipes for our Polynesian supper club coming up next weekend. As part of our soup course, I need to prepare a roast pork shoulder with a papaya seed rub. This past Monday, I was experimenting with my recipe. And I was left over with a glass baking dish with some delicious drippings and grease. I swear, although its horrible for you, there is almost nothing which smells and tastes as delicious as pork fat. You think there is...prove it!


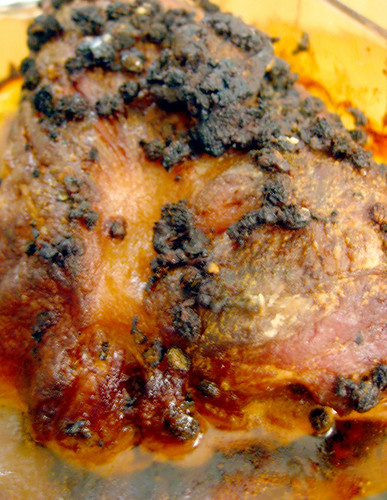
Pork shoulder roast with papaya and sea salt rub. Soooo good!

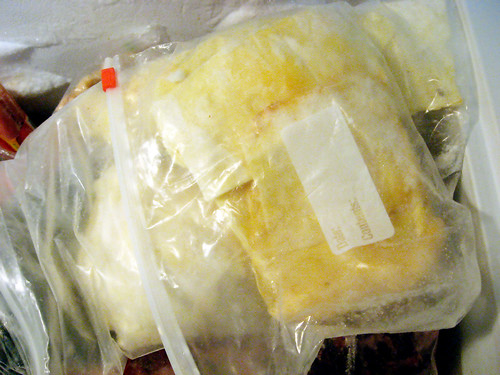
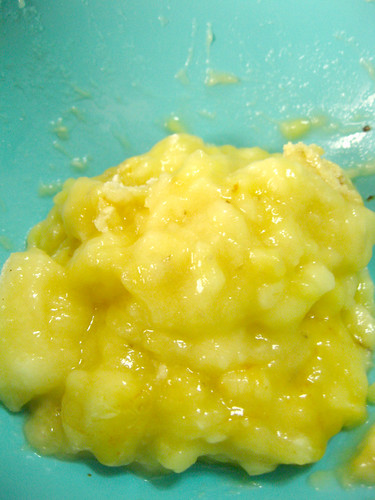
Anyway, I also had two bananas going bad which I needed to use up. I decided to make banana bread. But...I only have one loaf sized pan and it was currently being used with the small test pork roast. Hmmm....


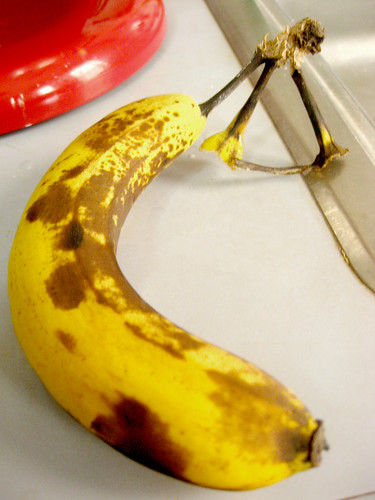
Yes, I had two bananas, but I already smashed one before I thought to take their pictures. Oh well.

To be lazy, I don't like doing dishes. (WHO DOES??) To waste not, I wanted to use both the delicious pork flavor on the glass dish and the bananas which were going bad. Why not put them together!! I decided to make a banana bread and just put the batter right into the glass dish once the pork roast was done!


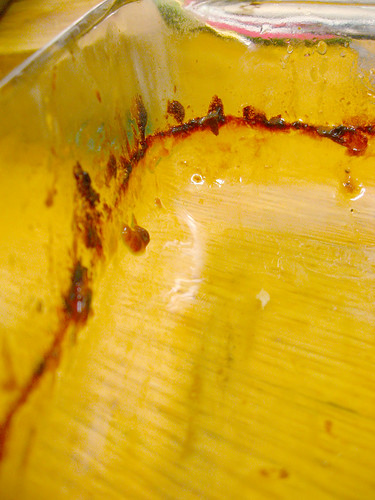
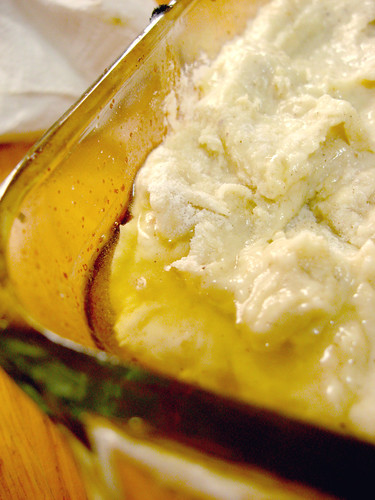
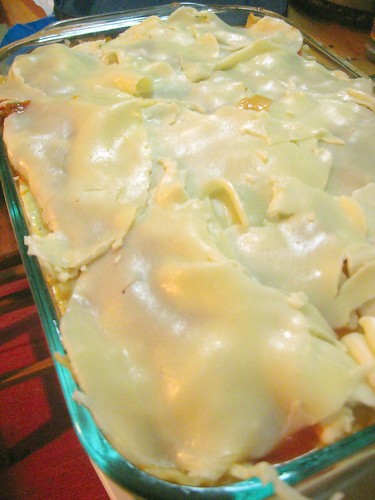
A detail of the caramelized pork drippings on the glass dish (left) and the batter in the pork fat (right).

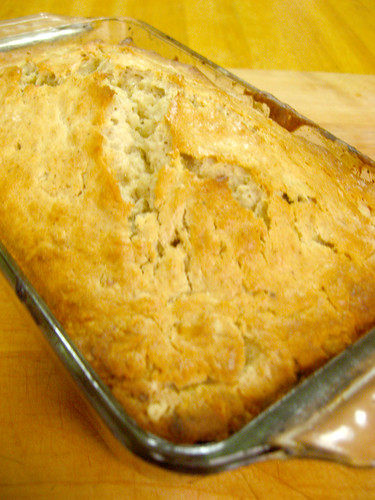
I left some of the pork grease in the bottom and put my banana bread batter right into the dish to bake and fuse with the caramelized porky yum.

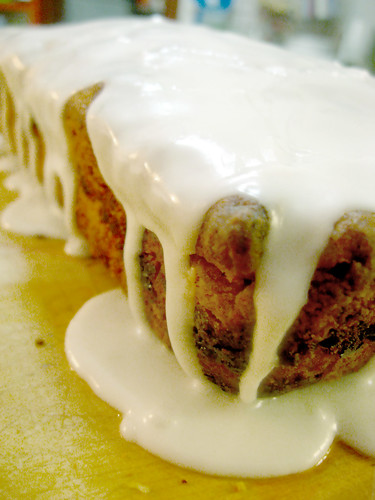
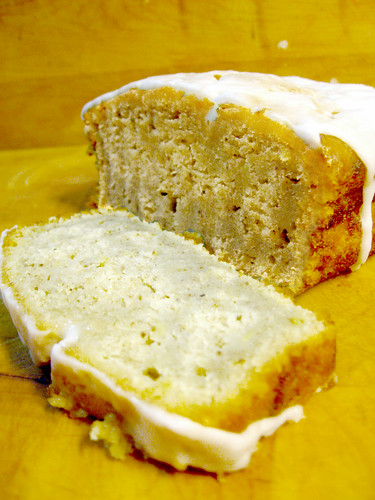
The result: banana bread with a slight hint of the savory salty sweet flavor of pork. I also added a lemon glaze. Delish!

Here's the basic banana bread I used:

Basic Banana Bread


  • 2 brown bananas
  • 1/2 c. butter
  • 3/4 c. sugar
  • 2 eggs
  • 1 tsp salt*
  • 1 tsp baking soda
  • 1/2 tsp nutmeg
  • 1/4 tsp allspice
  • 1/4 tsp cloves
  • 3/4 c. sour cream
  • 1 tsp vanilla extract
  • 1 tsp whiskey
Lemon Glaze
  • 1 c. confectioners sugar
  • 2-3 tbs lemon juice


  1. Preheat oven to 350.

  2. Mash bananas in a bowl.

  3. Cream butter and sugar together with a stand or hand mixer until light and fluffy.

  4. Add eggs 1 at a time to butter and sugar and mix.

  5. Mix dry ingredients together.

  6. Add to butter/sugar/eggs and mix together.

  7. Add bananas, sour cream, vanilla and whiskey.

  8. Pour into your pan greased loaf pan (the pork fat is not manditory).


  9. Bake until tests clean with knife or skewer test. About 45 - 60 minutes.

  10. Prepare glaze by mixing together two ingredients.

  11. Spread glaze over cooled loaf.


  12. Eat it, obviously!

Wednesday, July 29, 2009

Forkable Fiafia Menu


Dinner jacket and boufant encouraged, but not required. Photo: Vintage Vegas c/o BTSIC

The menu for our Polynesian Fiafia fest fuses traditional Oceanic recipes with contemporary style, combining the best ingredients, flavors to bring you a paradise of authentic dishes recreated with a splash of bygone glamor for the present pallet. The word "fiafia", used throughout the Pacific Islands, can mean celebration, get-together, and happy. Our fiafia will combine all of these, with a discerning splash of kitsch which leaves the tacky tiki at the door.
___________________________________________
Our Polynesian Fiafia Menu
presented by Forkable and BTSIC

Appetizer
Pickled Quail Egg Dumpling Steamed in a Banana Leaf
served with a ginger sake dipping sauce

Soup Course
Lemongrass Leek Consume served with Papaya Seed Crusted Pork
finished a garnish of fresh papaya and lime zest

First Course
White Fish Ceviche with Earl Gray-infused Champagne Vinegar
served with a salad garnish of fresh fruit and sweet basil

Entree
Rum and Coconut Braised Goat
served with manioc puree and sided with guava plantain chips

Dessert
Samoan Po'a
accompanied by a sea salt cracker finished with a garnish of mint and lime
___________________________________________

This event is BYOB. As always our supper club events are hosted in an intimate urban space and seats are extremely limited so reserve your spot right away!

Monday, July 27, 2009

Questions From the Readers: Can You Save Chicken Drippings?


Breakfast fried in chicken drippings.
Andrea, I just roasted my first chicken and I have a pan full of drippings. Can I save them for future use? What can I use them for? Can I freeze them? -Katie
Awesome! I love chicken grease! Its almost the best part of the chicken. Your question was well timed in that, although I didn't roast a chicken this weekend, I did need to finish up some chicken thighs we were BBQing in the oven when it started to rain on us friday night. Boo hoo about the rain, but we ended up with a small pan of chicken drippings which I used Saturday morning to make us a decadent and delicious breakfast!


Using the chicken grease in my cast iron pan, I first fried up a pan of potatoes to golden crispy deliciousness. Then I threw in some eggs and fried them up in the same grease. This grease puts the chicken back in the egg. (hmm that sounds sort of weird, but its true!) The whole house smelled deliciously chickeny and we had a breakfast which will definitely put meat on your bones.

Now in answer to your question, if you don't plan on using the drippings to make a gravy, I would still save them for sure. This stuff looks and tastes like liquid gold. Besides using the grease for frying up deliciousness, its also a great way to punch up a quick soup or sauce if you don't have time to make a chicken stock. Depending on the amount of grease, you may want to separate the two so you don't make your soup or sauce too fatty.

In terms of saving it, you can definitely freeze the drippings in a jar or Tupperware container until you need to use it. I prefer glass since I can easily throw it into the microwave to quickly defrost it when I want to use it. Some people like to separate the grease from the drippings when freezing, but again, depending on what you want to use it for, you may not need to.


Delicious pan fried breakfast in chicken drippings

In short, Chicken drippings are great to use in soups, sauces, stocks or for pan frying and can be frozen to keep for future use.
  • separate the grease from the juice if you plan to use the juice in a quick soup or sauce.
  • don't waste time separating the grease for stocks because you'll have to skim grease from your bones off the surface anyway.
  • use separated chicken grease for pan frying or deep frying (if you collect enough!)

Friday, July 24, 2009

Goodbye Kelvinator, Hello Kenmore


There's no easy way to tell you this, my old friend Kelvinator, but this relationship is over. I won't deny we've had good times together. I was a little scared that you were stalking me, when I left you behind in my last old, run down apartment, only to find you lurking in the corner of my new apartment, but we've made it work. You have pretty much kept everything nice and cool. But the party's over now.


I wasn't lying to you when I told you how much I love vintage antique housewares! I do, just not in a refrigerator. We've had fun together for sure, but you hemorrhage cold air at all your seams. You're a dirty old man inside and out. I hate to say this, but you're really too small. I know they say size doesn't matter but it does.


I've gone for a newer, younger and bigger model. There, I said it. I'm sorry. And one last final indignity, but I need back all those magnates and decorations I've given you over time, because I want to give them to your replacement.


Whats crowded in the Kelvinator looks like nothing in the new Kenmore.

So you know, I won't be here when you go. I've asked a bunch of guys to have you evicted when I'll be out, because, although I sound blase, I know it will hurt. I don't have the courage to see you, slumped and decrepit, a burned out has-been, waiting in the alley for that junk truck to pull up and have someone half-haphazardly throw you in the back of the trash pile for your last ride to the scarp yard.


But, its time to move on. I've got a new big Kenmore waiting for me now. Energy efficient, twice the size with glass shelves instead of wire. Beer bottles will never fall over in this one. I'm ready. This is it. Our final goodbye.

Tuesday, July 21, 2009

A Forkable Fiafia Post-War Polynesian Supper Club.

Although I like to control my kitchen with an omnipotent hand of steel (just kidding, well...sort of), yielding complete control of the reigns to collaborate with others can be such sweet surrender. I'm excited to announce, we'll be teaming up again, this time with one of Chicago's premier social scensters, Ira Cox, of Being Totally Sweet In Chicago fame, to bring you the next event in our series of clandestine culinary events for foodies, fashionistas and other adventurous urbanites.

Presenting...


A Forkable Fiafia Post-War Polynesian Supper Club.
presented by Being Totally Sweet In Chicago

Sunday, August 9 at 6 p.m.
5 course pre fixie

Our next dinner event will be a time machine re-imagining of American Polynesian food as haute cuisine. Polynesian restaurants in Mid-century America were a swanky, exotic treat. While 1940's Tiki restaurants were famous for wild approximations, our fiafia menu will fuse traditional Polynesian recipes with contemporary style, combining the best ingredients, flavors and smells to bring you an alternate edible history. Our collaborative menu will surf the islands to bring you a paradise of authentic dishes recreated with a splash of bygone glamor for the present pallet.

This event is BYOB. Suggested contribution of $60.00 for online preregistration. As always our supper club events are hosted in an intimate urban space and seats are extremely limited so reserve your spot right away!

Check out our official press release for more details.

Sunday, July 19, 2009

"Healthy" Camp Cobbler With Double Acting Alka Seltzer


Imagine this: While vacationing with a bunch of friends, you've snagged a bunch of cherries from a ripe cherry tree. You really want to show-off by whipping up an awesome cherry cobbler on the fly. You've got just the recipe in mind, but you soon realize your friend's cabin does not stock baking powder? Is this the end of your grandstanding dreams?

If you say yes, turn to page 5, where you will die a gruesome death.

If you say no, continue to read on.
_______________________________________

Congratulations, you said "no", this isn't the end to your grandstanding dreams. You will live on to be the obnoxious braggart that you are. But first, you need to put your money where your mouth is and figure out a way of this no-baking-powder-pickle. Think about what you can use instead. What does baking powder do for the recipe and what else might create the same effect.

Okay, you know baking powder reacts while baking, creating bubbles which lighten baked goods and make then fluffy. Baking soda can be mixed with vinegar (similar to the volcano science fair project) for the same results.

Sorry, you don't have baking soda either, but thinking on this reminded you of the packets of alka seltzer you always carry in your bag to counteract your nightly binge drinking.

Cobbler with alka seltzer? This is brilliant you think! What a way to cure all your aches and pains. What a tasty treatment. Practice your swagger; its time to self medicate while baking!


crushed alka seltzer to substitute for baking powder.

Here's the recipe I came up with when faced with the exact same situation last weekend at my friend's cabin. We all ate it, and many people burped to show their appreciation and gratitude!

Cherry Camp Cobbler
in a 9" x 12" pan, 16 - 20 servings


  • 2-3 c. bing cherries, pitted
  • 1 c. butter, melted
  • 2 c. flour
  • 3 c. sugar
  • 2 c. milk
  • 3 packets of alka selter (6 tablets)
  • 9" x 12" baking dish

pitting the cherries by pulling the stems.
  1. Preheat oven to 400 degrees.

  2. Rinse cherries and pit them. To pit these, fresh from the orchard, I was able to extract the pit by pulling the stem while squeezing the cherry. The pit stayed attached to the stem and I could basically pull the cherry off the pit.

  3. In a sauce pan, place the cherrys with 1 cup of sugar and bring to a boil. Boil for a couple of minutes and then remove from heat. Drain cherries and reserve Bing cherries are very tart so we need to precook them with a bit of sugar to infuse some sweetness into the fruit. This will also help cook some of the juice out of the fruit so the cobbler won't be too soupy.

  4. Drain cherries, reserving 1/4 c. of juice. Set aside cherries and 1/4 c. juice. Use the rest of the juice to make a kick-ass old fashioned. (although it may appear to be, this drink is not optional.)

  5. Melt the butter on the stove top or in a microwave if you have one. Pour melted butter into the bottom of your 9"x12" baking dish or pan.

  6. Crush alka seltzer tablets in a bowl or cup until they are a fine powder, set aside.

  7. Measure all your dry ingredients: Mix dry ingredients together including the crushed alka seltzer. Mix your milk and reserved 1/4 c. cherry juice. Have your cherries in a bowl along with all your other mixed ingredients ready to go along with your baking dish with the melted butter. Because we're using alka seltzer instead of baking powder, its going to react immediately so we want to mix it at the last possible minute and pop it into the stove as soon as possible.

  8. Quickly assemble your cobbler: Mix the dry and wet ingredients and pour them into the pan with the butter. Spoon the cherries into the batter. Try to distrubute evenly.

  9. Bake for 30-45 minutes or until toothpic/knife can be poked into cobbler and come out clean.

A delicioulsy fluffy cobbler ready to eat.

This cobbler recipe is always delicious but the addition of the alka seltzer only makes it better! I would say this qualifies as a healthy snack. Though its definitely not low-fat, it does make you feel way better after eating (it has aspirin in it)!

**Sorry the pictures are not as good as usual, they were taken by Ira's iPhone while we were on vacation.

Friday, July 17, 2009

Left Over Remix: Frozen Cheese Makes Fabulous Lasagna

Yes, you can freeze cheese, as we talked about in the last post. Moving on. What did I do with the left over cheese from our wedding? Well, since, frozen cheese should be melted, a big batch of lasagna.


Lasagna is a quintessential comfort food which is always a crowd pleaser. If you've ever eaten one, you can probably make it. The basic recipe is a simple layering technique using noodles, sauce and cheese. A large pan can as easily be made as a small one, so making it in bulk to supply a weeks worth of lunches can save you time and money.

I often take liberties with my recipe substituting anything and everything from tortillas instead of noodles and bbq sauce instead of a marinara. However, to use up my frozen left over provolone cheese along with a jar of last fall's roasted marinara I have left in the pantry, I decided to make the "classic" version of this recipe, which is usually comprised of layers of lasagna noodles, a meaty tomato sauce, layers of melty cheese and a cottage cheese/ricotta layer mixed with egg which acts as the glue which holds the dish together.

Before you learn to run you learn to walk, so lets walk through this classic recipe so later we can adulterate it all we want!

Classic Lasagna
for 9" x 12" pan, makes 12 - 16 servings


  • 16 sheets of lasagna noodles
  • 1 quart of marinara
  • 1 lb ground beef
  • 1 16 oz. container of cottage cheese
  • 2-3 large eggs
  • 1 Tbs Italian seasonings -or- 1 tsp each dried thyme, oregano and basil
  • 2 lbs of cheese (sliced or shredded)
  • salt and pepper to taste
Preheat the oven to 375.

Season ground beef with a sprinkle (1/4-1/2 tsp) of salt and pepper.

Brown ground beef in a skillet over medium heat.

In a bowl, mix cottage cheese, Italian seasonings, and eggs. I also sometimes add Parmesan cheese into the mix if I have it around.

Bring a large pot of water with 1-2 Tbs of olive oil to boil. Boil lasagna noodles until they are slightly soft on the surface but still hard at the center. They should be flexible enough to bend but not tear easily. You want them not fully cooked because they will finish cooking while the lasagna bakes.

Drain boiled noodles. If you pour a small amount of olive oil on the noodles, this will help them from sticking together.

Mix ground beef together with marinara.


lasagna with slices of defrosted cheese.

Assemble your lasagna: In a 9" x 12" pan, layer the bottom of the pan with 4 sheets of noodles. Then layer with 1/3 of marinara and meat sauce and then with 1/3 of cottage cheese and egg mixture. Top with slices or sprinkles of 1/4 of the cheese. Place 4 more sheets of noodles on top and continue layering until three layers are complete. Top with your final 4 sheets of noodles and top with the last amount of cheese.

Place lasagna in the oven and bake for 45 minutes. Place pan on a baking sheet while baking to collect any overflow if the lasagna bakes over. or until cheese is golden.


Eat up!

Wednesday, July 15, 2009

Cooking Questions: Can Cheese Be Frozen?

After our wedding, I had a bunch of food left over. I hate waste. My most hated job would have to be a garbage man, not because of the grossness and stink, but because I would be horrified by the amount of waste we produce. Don't get me started. As absolutely exhausted as I was after our wedding, the last thing I felt like doing was using up the 5-10 lbs of sliced cheese I had stacked in my fridge. Since it was already in zip lock bags, I just threw all of them into the freezer and went to bed. This begs the question: Can cheese be frozen?


There's a lot of debate about freezing cheese. Some say hard cheeses freeze better, some say you should only freeze soft cheese. It seems everyone has a slightly different take on the issue. In a good article from the TheNest.com, author, Nest Colleen, describes what happens to cheese as it freezes:
"Because of the moisture content or vein-y, open texture of most cheeses, ice crystals develop inside as cheese freezes. (Hey, that rhymes!) The ice “breaks” the curds in the cheese apart, which alters the texture of the cheese from creamy and smooth to crumbly or grainy when it thaws."
This change in texture is only apparent when you eat the cheese raw. However, once its cooked , the texture of the melted cheese is relatively indistinguishable from fresh cheese. So the answer is, yes, most cheeses can be frozen, but only if you plan to use it in a heated dish like a casserole or enchiladas.

Colleens final stance urges us never to freeze fancy cheese and although it is possible to freeze cheese of a lesser quality it shouldn't be taken on as one would freeze bulk bread or meat because unlike these examples, the quality of the defrosted cheese is so much less then the quality of the original. While I sort of agree with her, I have to take a different take on this matter.

In terms of buying in bulk, if you see a great sale on the pre-shredded mozzarella or cheddar cheeses which you would probably melt on pizza or nachos anyways, I say GO FOR IT! Buy a bunch and freeze it. In my experience once melting frozen cheese, it tastes great and I've never had any complaints.

Sometimes, like in my case after my wedding, you may find yourself with a lot of cheese you don't have time to deal with, I think it's way better to throw cheese in the freezer then throw it in the trash. I think Colleen would agree here since my cheese was basic provolone and swiss.

I think, however, this holds true for fancy cheeses too. I totally agree they should be enjoyed in their best possible quality and should never be purchased with the intent on freezing. But when dealing with left overs, waste not, want not. Even in the worst case scenario, if the cheese is totally destroyed in the freezing, at least then you have that knowledge from experience and you haven't lost anything since it would have probably been tossed anyway.

Because there's so much back and forth between which cheeses freeze well and which don't, my opinion is everyone should try things out for themselves and learn by trial and error what works and what doesn't. Don't be afraid to try something just because random voices on the internet which present themselves as "experts" tell you not to.

Once melted, I defy anyone to tell the difference between Kraft cheese which was fresh or frozen. Its not that high quality to begin with. If they can, send them packing to go hang out with that stupid pretentious bow-tie dude from America's Test Kitchen. You don't want to be around that type anyway!

Monday, July 13, 2009

Four Easy Steps To Freezing Berries

Berries are expensive, especially out of season. Freezing them is so easy its ridiculous. So save money, buy berries when they're in season and on sale, and freeze those bad boys for later.


A few weekends ago, I bought all these pints of blueberries and raspberries for $1 (the 1/2 pints of raspberries were 50 cents). Besides being in season, the reason they were so cheap was because they were on the verge of going bad. I had to pick and choose through the containers to make sure I didn't grab any moldy ones.


So I ended up with 16 pints of berries about ready to go bad. The day after I bought them, I made the blueberry and raspberry rhubarb pies I just posted about, but that still left me with about 12 pints of berries on the brink of destruction. The weather was super nice, and I didn't want to waste any more time in the kitchen. No problem! I quickly and easily froze the rest. Here's how.

Berries are super easy to freeze, requiring just these four steps:
  1. Wash the berries to remove any dirt and/or nastiness.


  2. Lay berries out on a baking sheet.


  3. Place trays in the freezer for a day or two until the berries are frozen.


  4. Scoop the frozen berries into plastic freezer bags and throw those bad boys back in the deep freeze.


Easy! Next time someone comes over unexpectedly, impress them by whipping up some quick blueberry muffins or cobbler. Frozen berries are good for frozen fruit smoothies or as a replacement for ice in a fancy cocktail.


Tips:
  • You may want to measure the berries when putting them in your freezer bag so you'll know the exact amount of cups you have for future recipes.

  • I also suggest writing the date you froze them and the amount on the bag so you don't forget how long they've been stuck under that frozen pizza.

Saturday, July 11, 2009

Scrap Dough Pie

Don't you always have scrap dough left over when making a pie? I do. I hate throwing anything away, so I'll put it in the fridge, only to forget about it and have to throw it away later. Don't do that either. Make a scrap pie!


Scrap Pie

(Yes, this is obvious, but I don't care. I'm going to blog about it anyway.)
  1. Just set aside some extra fruit to use as a pie filling. When you're done with your other pies, combine all your scraps and roll them out.

  2. Mix your fruit filling (I like to do something a little different with it then the other pies so it is more special) and place in the center of the dough.

  3. Fold the dough up and around the pie filling to form a little rustic tartlet.

  4. Brush with egg. milk, oil, or whatever you use and drizzle with sugar.

  5. Throw that bad boy into the oven with your other pies.
Bam! A delicious little treat. Kids love them!

Thursday, July 9, 2009

Blue Food: Blueberry and Lime Pie


You don't like blueberry pie? Why not. You're grossed out by blue food? Well, get over yourself. You're a jerk. Stop reading my blog.

OK, Ok, Alright. You're not a jerk. Different stroke for different folks. Its not our job to preach about pie, but for 99.9% of you, when I say blueberry pie is the best, I know, I'm preachin' to the choir. To all you .1% out there, get over yourself. Ahh! There I go again. Don't pay attention to me. Lets just get to the recipe.


Blueberry and Lime Pie
  • 2 pints blueberries
  • 2 tsp. lime zest
  • 1 1/2 c. sugar
  • 2 Tbs Pimms Cup liquor
  • 1/4 corn starch
  • 1 pie crust
I guess technically this could be called Blueberry Citrus pie as the Pimms Cup liquor is a nondescript citrus flavor, but I liked the sound of blueberry lime pie. The lime zest and the Pimms helps set off the sweetness in the berries. If you don't have Pimms, I suppose you can substitute an orange liqueur like Grand Marnier or sweetened lime juice. If you don't drink, again, why are you reading this blog? Just kidding. I don't know why I am so antagonistic today. I love all my readers. Truly. Try some orange extract. If you don't have that, just add a bit more lime zest and perhaps some juice.

Directions
(pretty much the same as the Raspberry Rhubarb pie from the last post.
  1. Preheat the oven to 375

  2. Roll out bottom pie dough. Place in a pie pan, and pre-bake for 10 minutes until golden brown.

  3. Mix filling and place in the pie crust.

  4. Put a top crust on in whatever decoration you choose. You can do a whole top or a lattice. Above, I used 2 different sized juice glasses to cut out circles and overlap them as my topping. Fun!

  5. Brush pie with egg, milk, or oil, whichever you choose. Sprinkle the top with sugar.

  6. Bake at 375 for 45-60 minutes until crust is golden brown and filling is bubbly.

  7. Cool completely before eating.
99.9% of you can now dig in.

Tuesday, July 7, 2009

A Sweet Tart Treat: Raspberry Rhubarb Pie

This week I was pondering an important pie question: Can tart + tart = tasty? Normally you want to pair a sweet fruit with a tart fruit. Strawberry Rhubarb is classic. Peach and raspberries is the best. What happens when you take out the sweet and pair tart with tart: raspberry and rhubarb. Will they cancel each other out? Will it be too tart to take?


I was curious, so I mixed rhubarb and raspberry together in pie form to see what would happen. The results were delicious. These fruits are strong enough to maintain their individual flavors, but subtle enough for the sugar melt into the flavors so the sweet and the tart work together to form this little sweet tart. Here is the recipe I came up with:

Raspberry Rhubarb Pie


  • 2 pints of raspberries
  • 2 cups chopped rhubarb
  • 1 1/4 c. sugar
  • 1/4 c. corn starch (or flour)
  • 1 Tbs rosewater
  • 1 Tbs powdered ginger
  • 1 pie crust
Preheat oven to 375 degrees.

Make your pie crust. Roll out the dough and place bottom into a 9" pie pan. Here are 3 dough recipes I use all the time depending on my mood, and here are some tips to help with your dough.

Place pie pan with bottom crust only in oven and bake for about 10 minutes until the crust is hard and a bit golden. I like to pre-bake my bottom crust whenever I'm making a pie with a super soupy filling.

Mix above ingredients together and place into the pre-baked bottom pie crust. These ingredients get very soupy, which is why we need to add cornstarch or flour to the mix, to help the fruit juices thicken.

Place your pie crust top over your filling. I like doing a lattice crust top, but you can do whatever top you wish. You probably don't have to do a top, but for fruit fillings which can be pretty liquidy, I like having a top crust to help keep the pie shape when serving. Here's some tips on doing a lattice pie crust

Place pie on a baking sheet (to catch any overflow from your pie so it doesn't end up on the bottom of your stove) and put pie into the oven.

Bake for approx. 45 minutes, until crust is golden. Let cool completely before serving. It will help the filling harden so you aren't serving raspberry rhubarb soup.

Eat up and enjoy. This is the best part!

Monday, July 6, 2009

4th of July Pie


Hey there. Remember me? I've crawled my way out of the wedding hole and I'm back! Just in time for summer fun. This past week, I gave myself a break from the blog, so I could kick back, relax, chug some beers and blow up some shit in the good old "Amurican" spirit. But if you think the hot weather can keep me out of the kitchen, think again!

There's nothing more close to my USofA heart then a great sale and when I found raspberries and blueberries on sale for $1 a pint, you can bet your Benjamin Franklin I bought a shitload of both.


There's nothing more american then pie, so for this 4th of July, we showed that these colors do run: down your gullet! Red: Rhubarb raspberry pie. Blue: Blueberry and Lime pie. White: The color of your face when you see our founding fathers jump out of the grave and get in line for a slice of these pies!


This week, we're going to celebrate the summer with fruit and pie time!